Preparation for a journey
I am fortunate to have a great camper/caravan. A wind up Goldstream Crown. It has a comfy bed, indoor table and seating for those wet days, a fridge and stove, and lots of storage. Easy and economical to tow, it sits low for towing and winds up to full height on arrival. Very luxurious camping.
My tow vehicle – a Ford Falcon wagon.
I love this car. It’s a comfortable ride, has lots of get up and go, including when towing, and as it’s dedicated LPG, it’s cheap as chips to run. But being dedicated LPG poses a problem for this trip. LPG is becoming less popular. It’s not carried at all petrol stations. And as I’m travelling through remote areas, if it’s out of stock i’m going to be sitting there until it’s in stock again. Because the only alternative is a tow truck. So while it seems extraordinarily indulgent, we’re upgrading the Falcon. The other justification to this is that the Falcon has almost 500,000km on the clock. (In a footnote to this post, the Falcon died a death a fortnight before I left, so it was a good decision!)
My criteria:
◦ Must be a 4WD – i wanted the capacity to leave the van and go to places inaccessible with it.
◦ To be able to camp in the back of it if i chose.
◦ To be able to carry kayaks – now that posed a problem as I’m not very tall and a 4WD is. Solution – a Ute!
◦ Must be a space cab or extra cab – I wanted to be able to still carry my groceries and everyday stuff, but also have the length in the tray to sleep in it.
◦ Must have suicide doors to access said stuff
◦ Must be diesel
◦ Must be reliable and presentable, but not so immaculate that I feel guilty taking it anywhere in case it gets a scratch on it
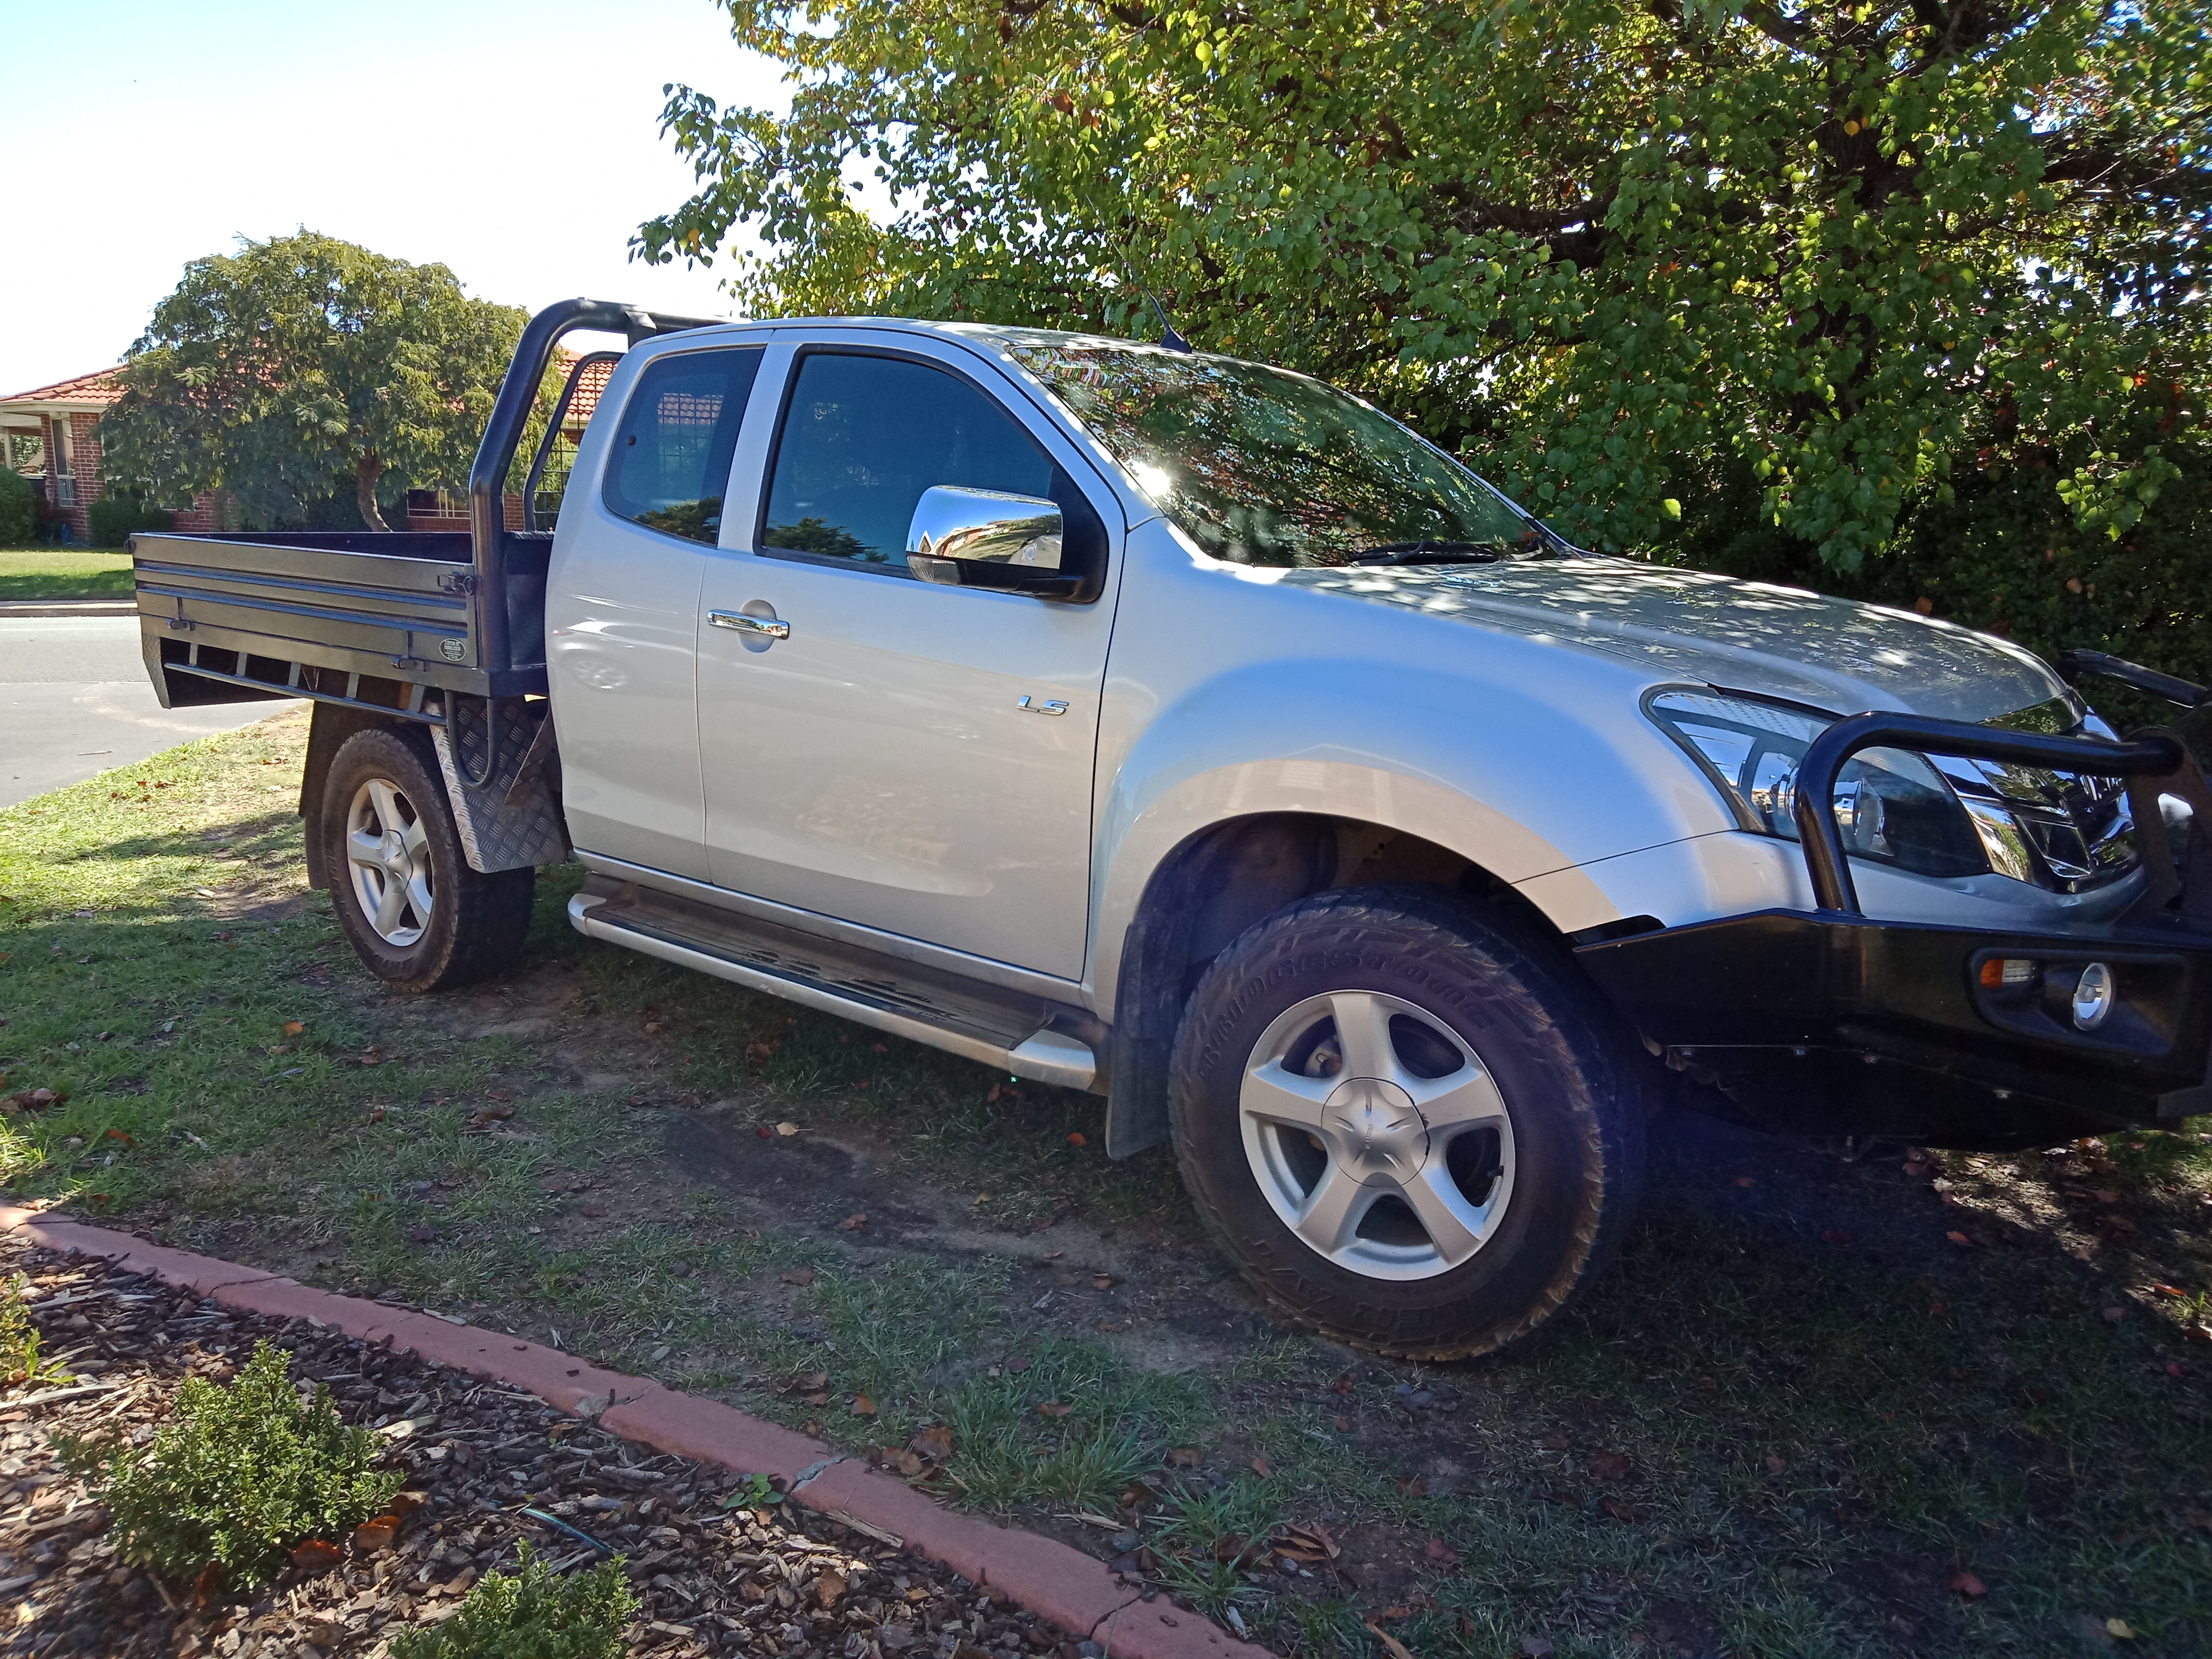
After much searching I settled on an Isuzu D-Max.
I then set out in search of a canopy. While its not what I was originally looking for, I’m quite pleased with what I ended up with. Farmer John from Ballarat had a metal canopy for sale. It had been listed on Gumtree for quite some time, with the most appalling blurry photos. It was really cheap as it had been there for some time, and after a few texts with better photos we decided to go take a look. Lo and behold we came back with a canopy on the Ute. While not quote the simple open canvas canopy i originally had in mind, this will enable me to duck away for weekends without the van, and to do cheeky stealth camping when needed without the van, parked on a street somewhere.
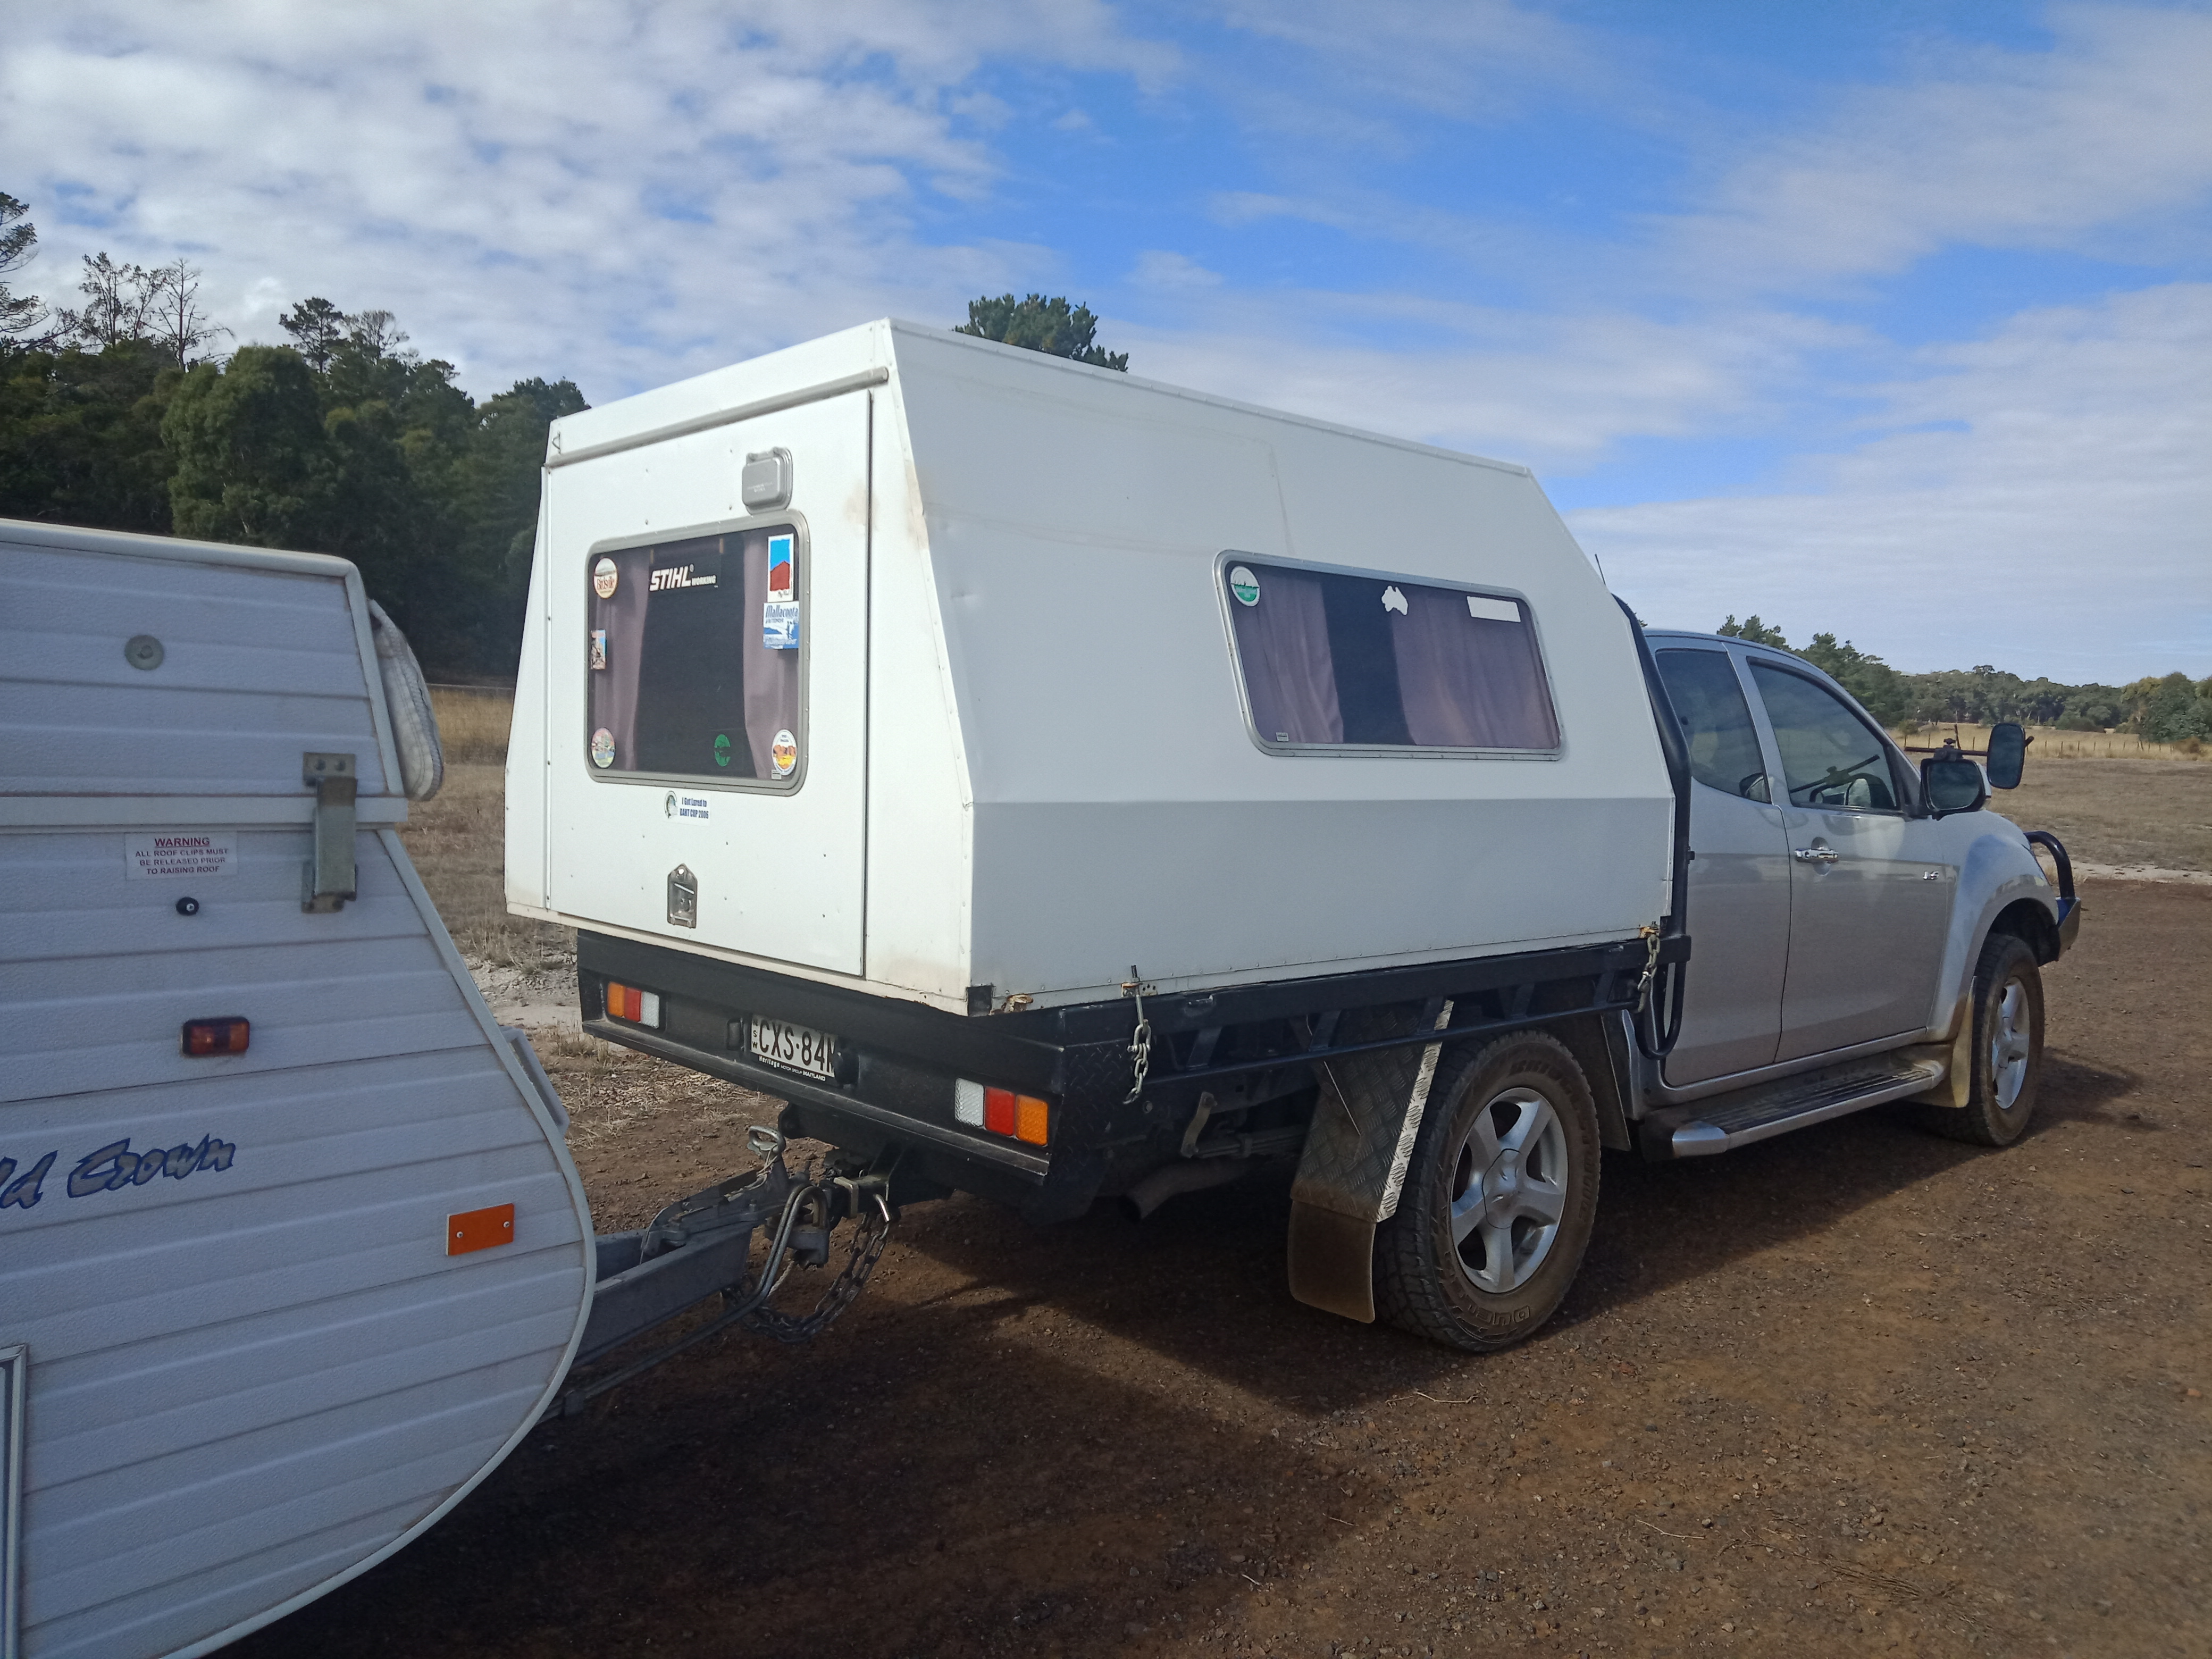
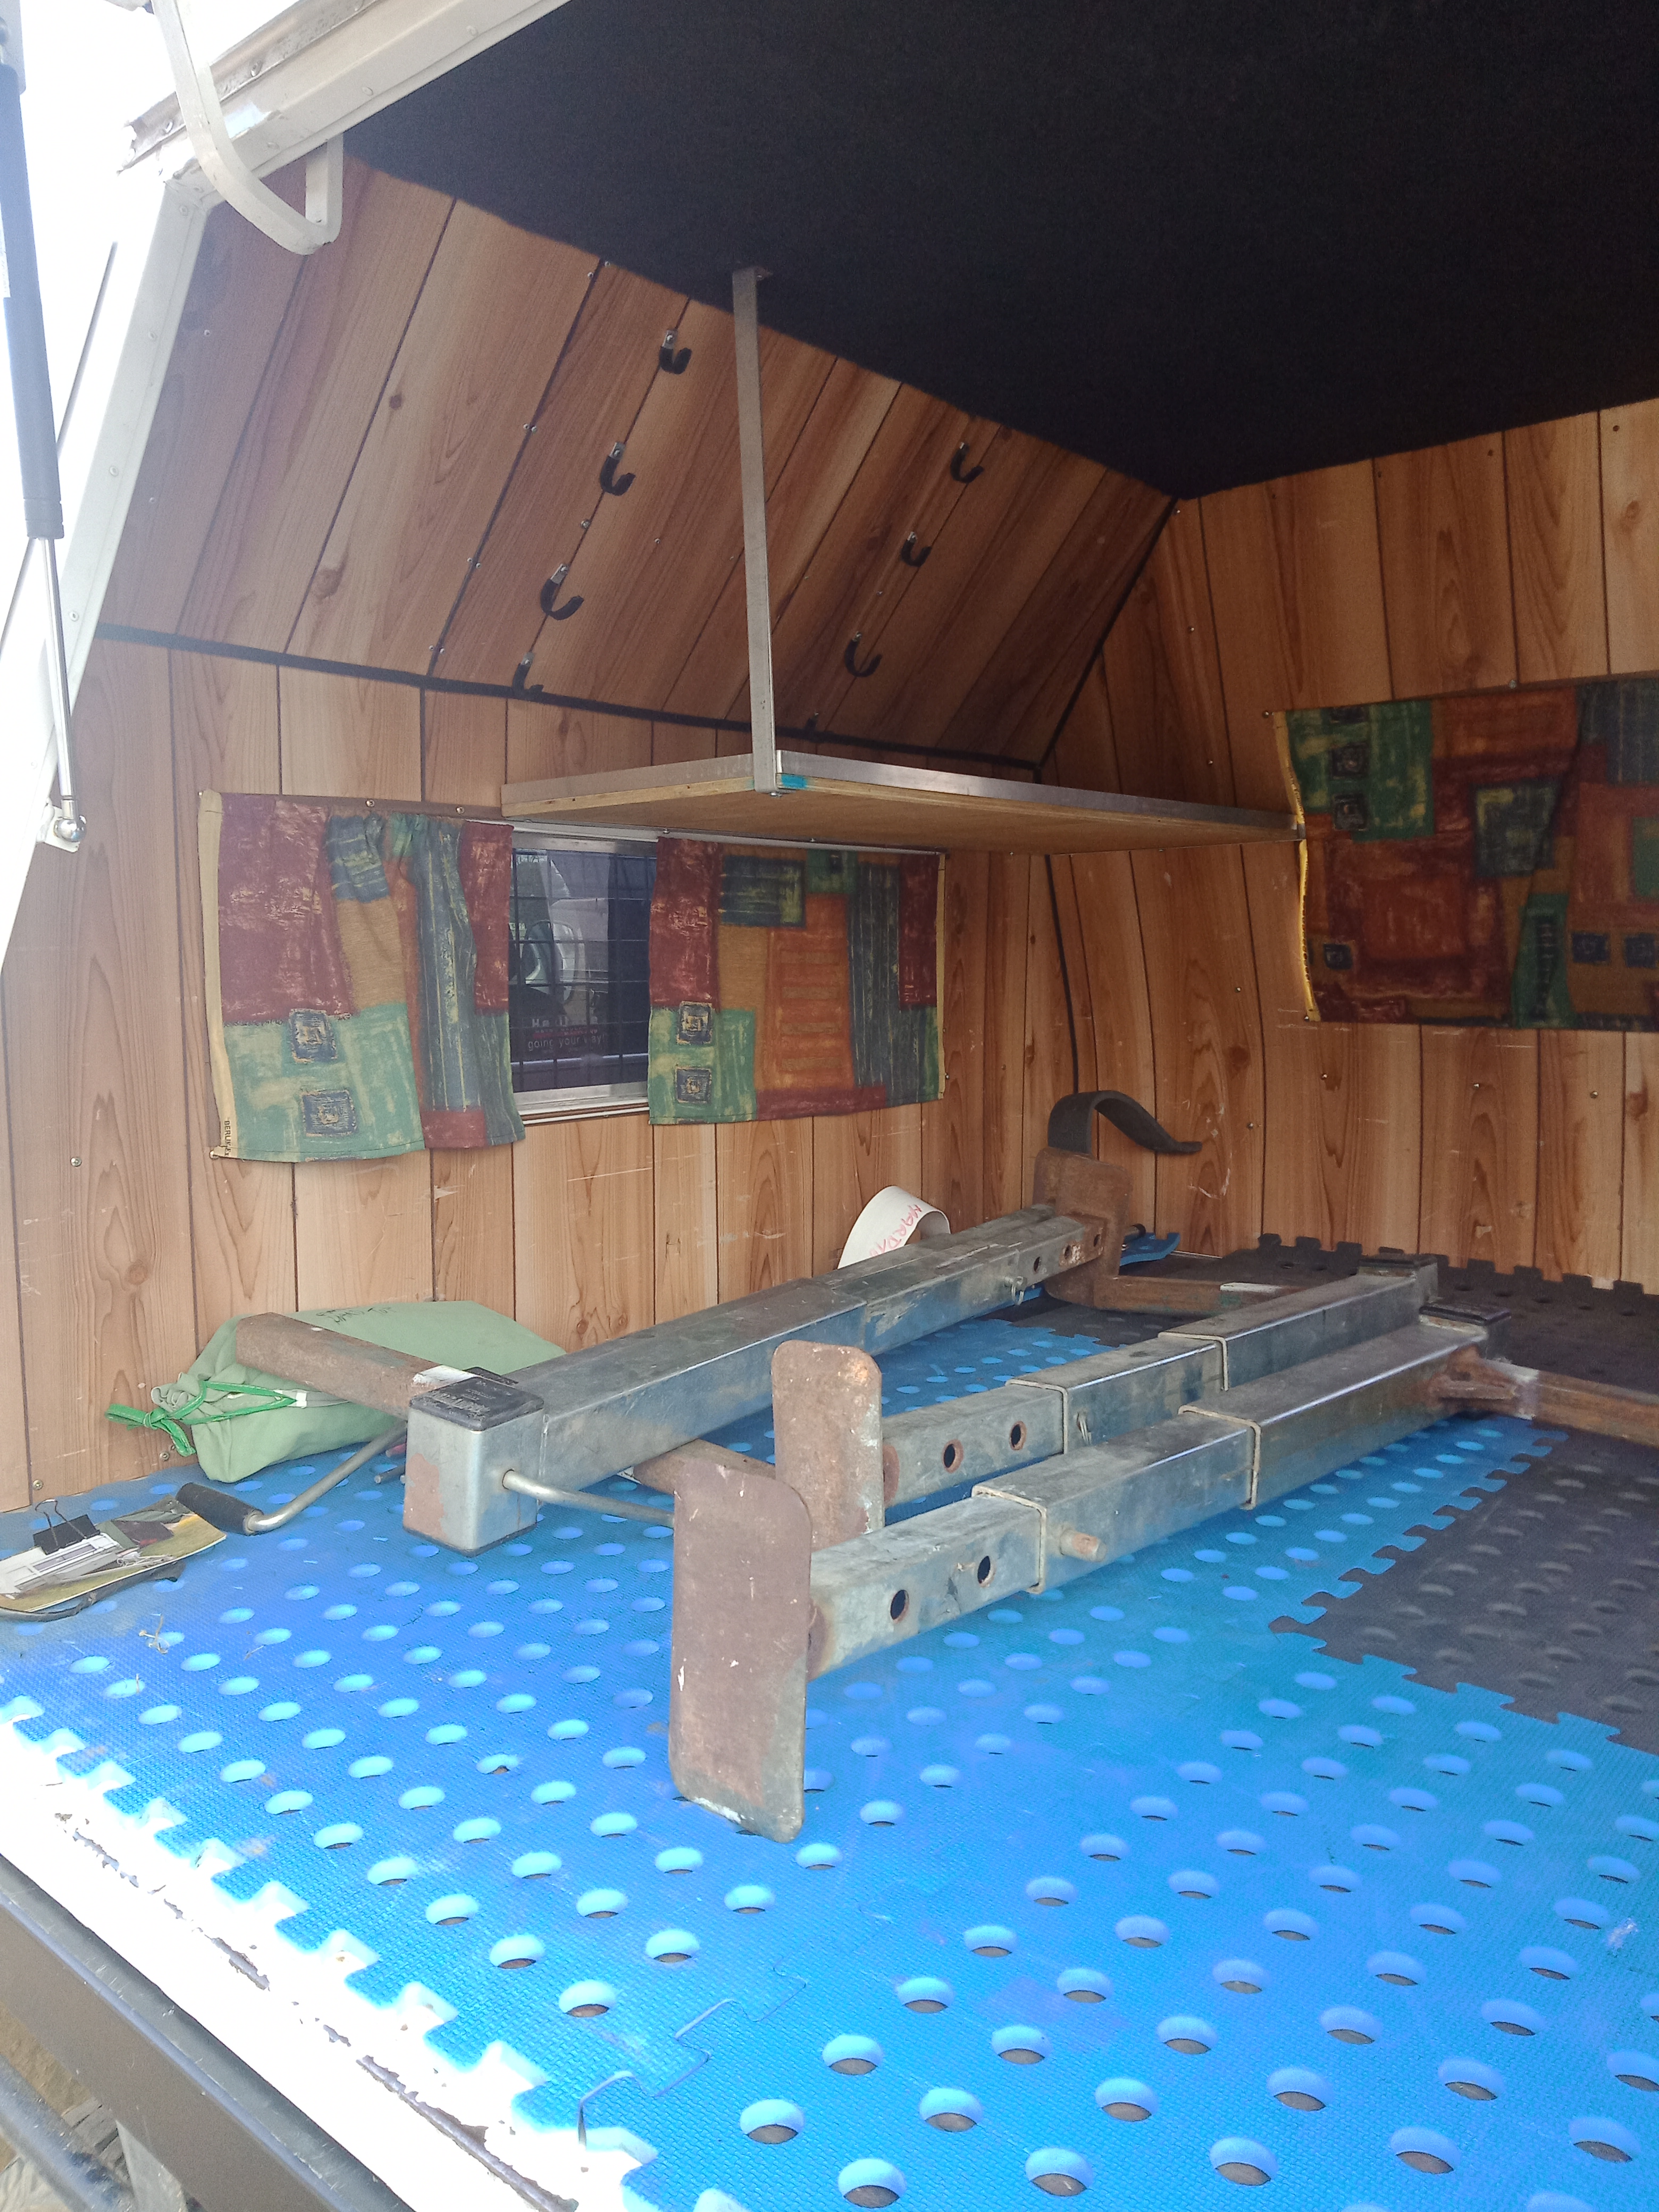
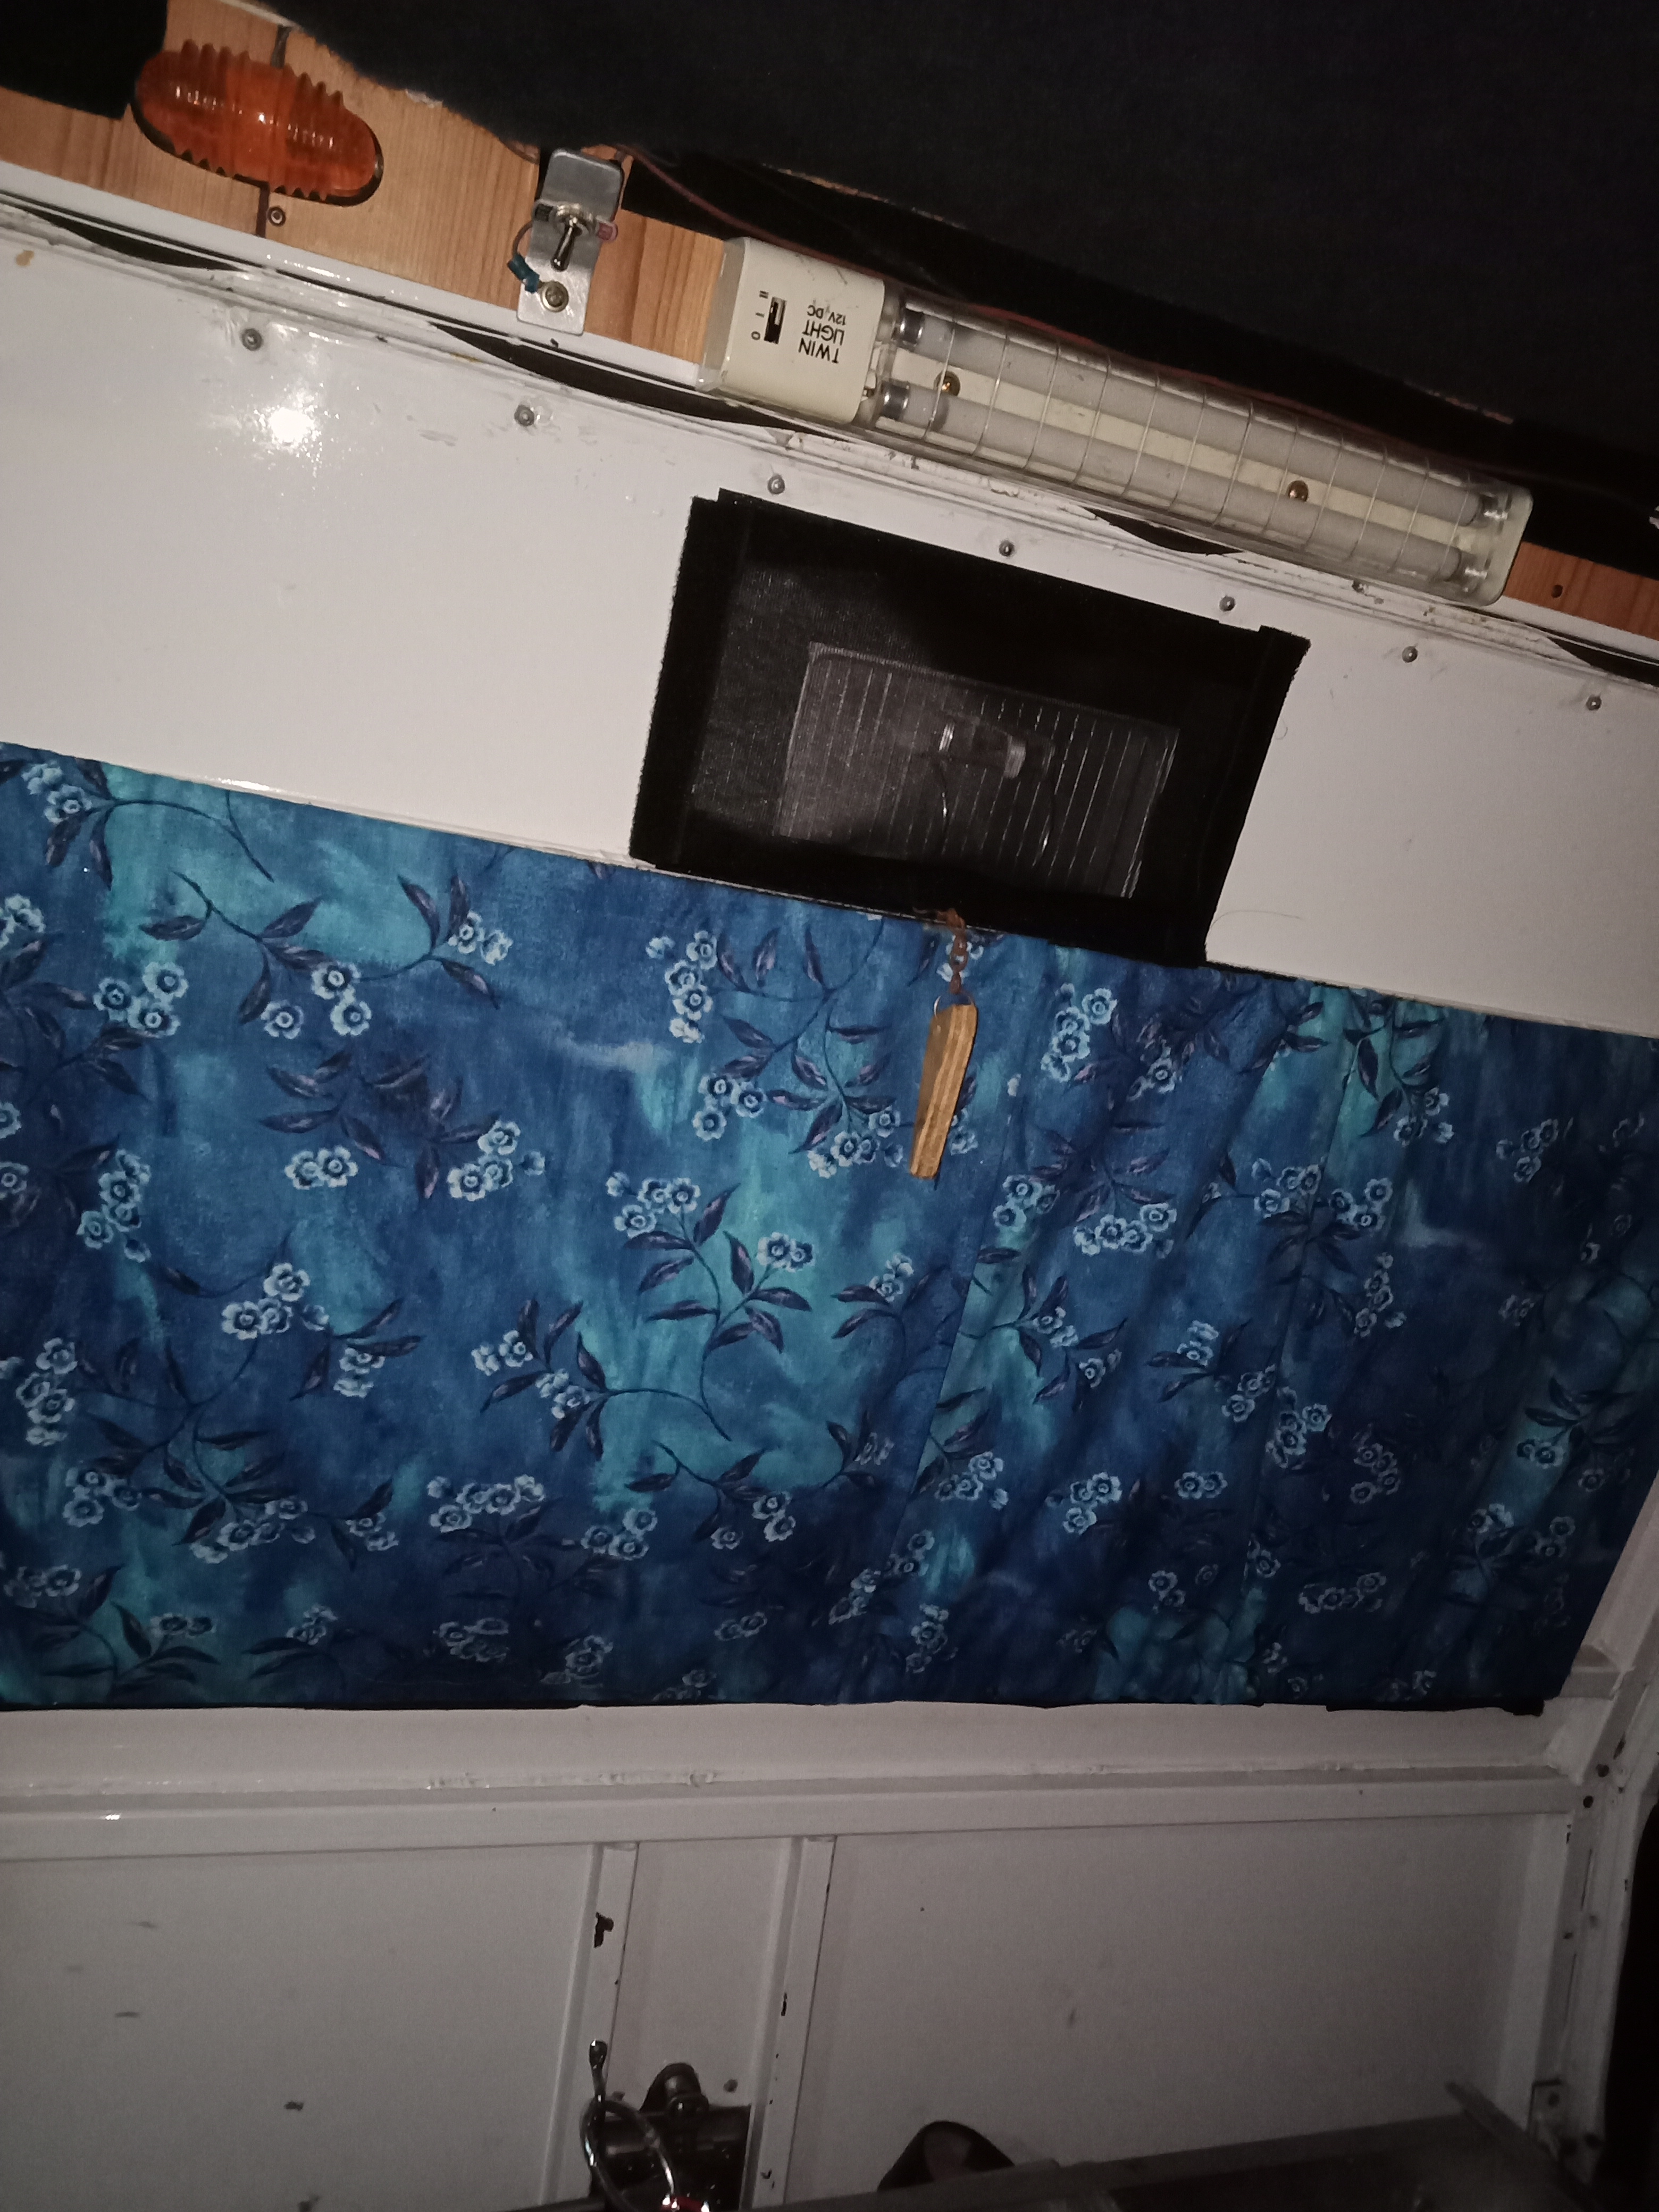
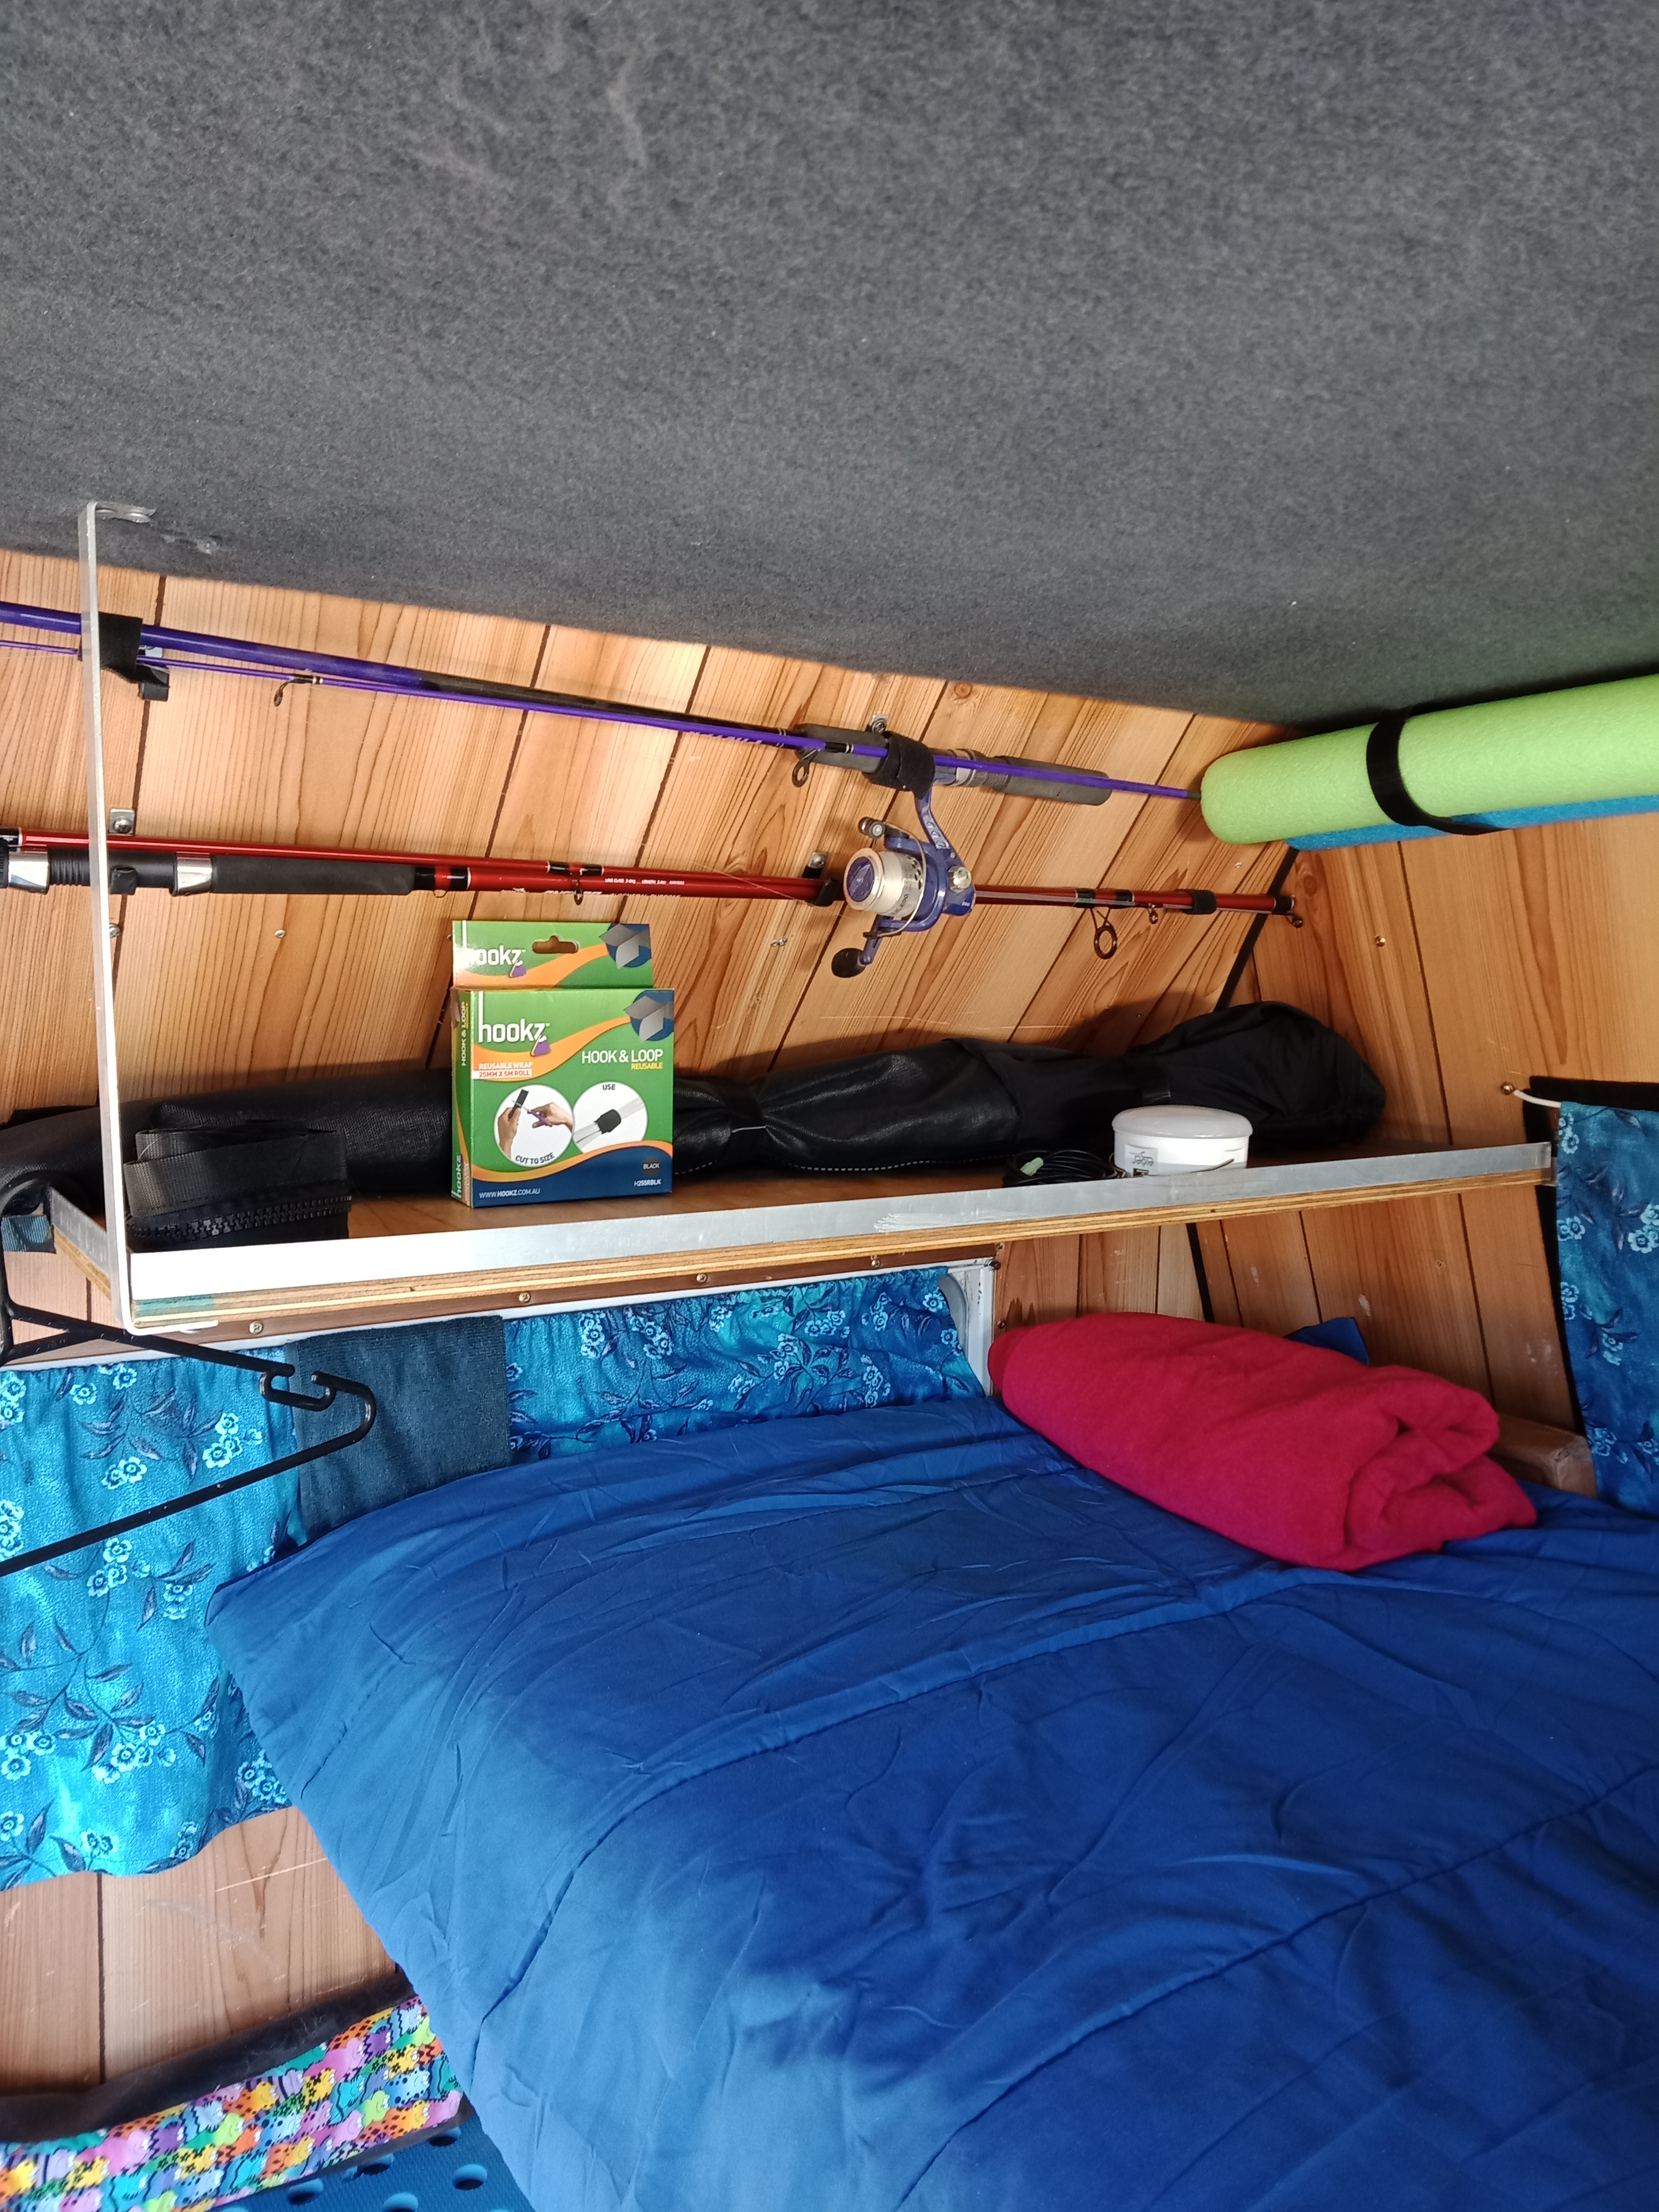
The canopy is old, but it is insulated and lined. It has fixed windows but has a whirly gig and vents. There are lights which need wiring, a shelf, and a jarrah floor. I’m looking forward to setting it up for the trip.
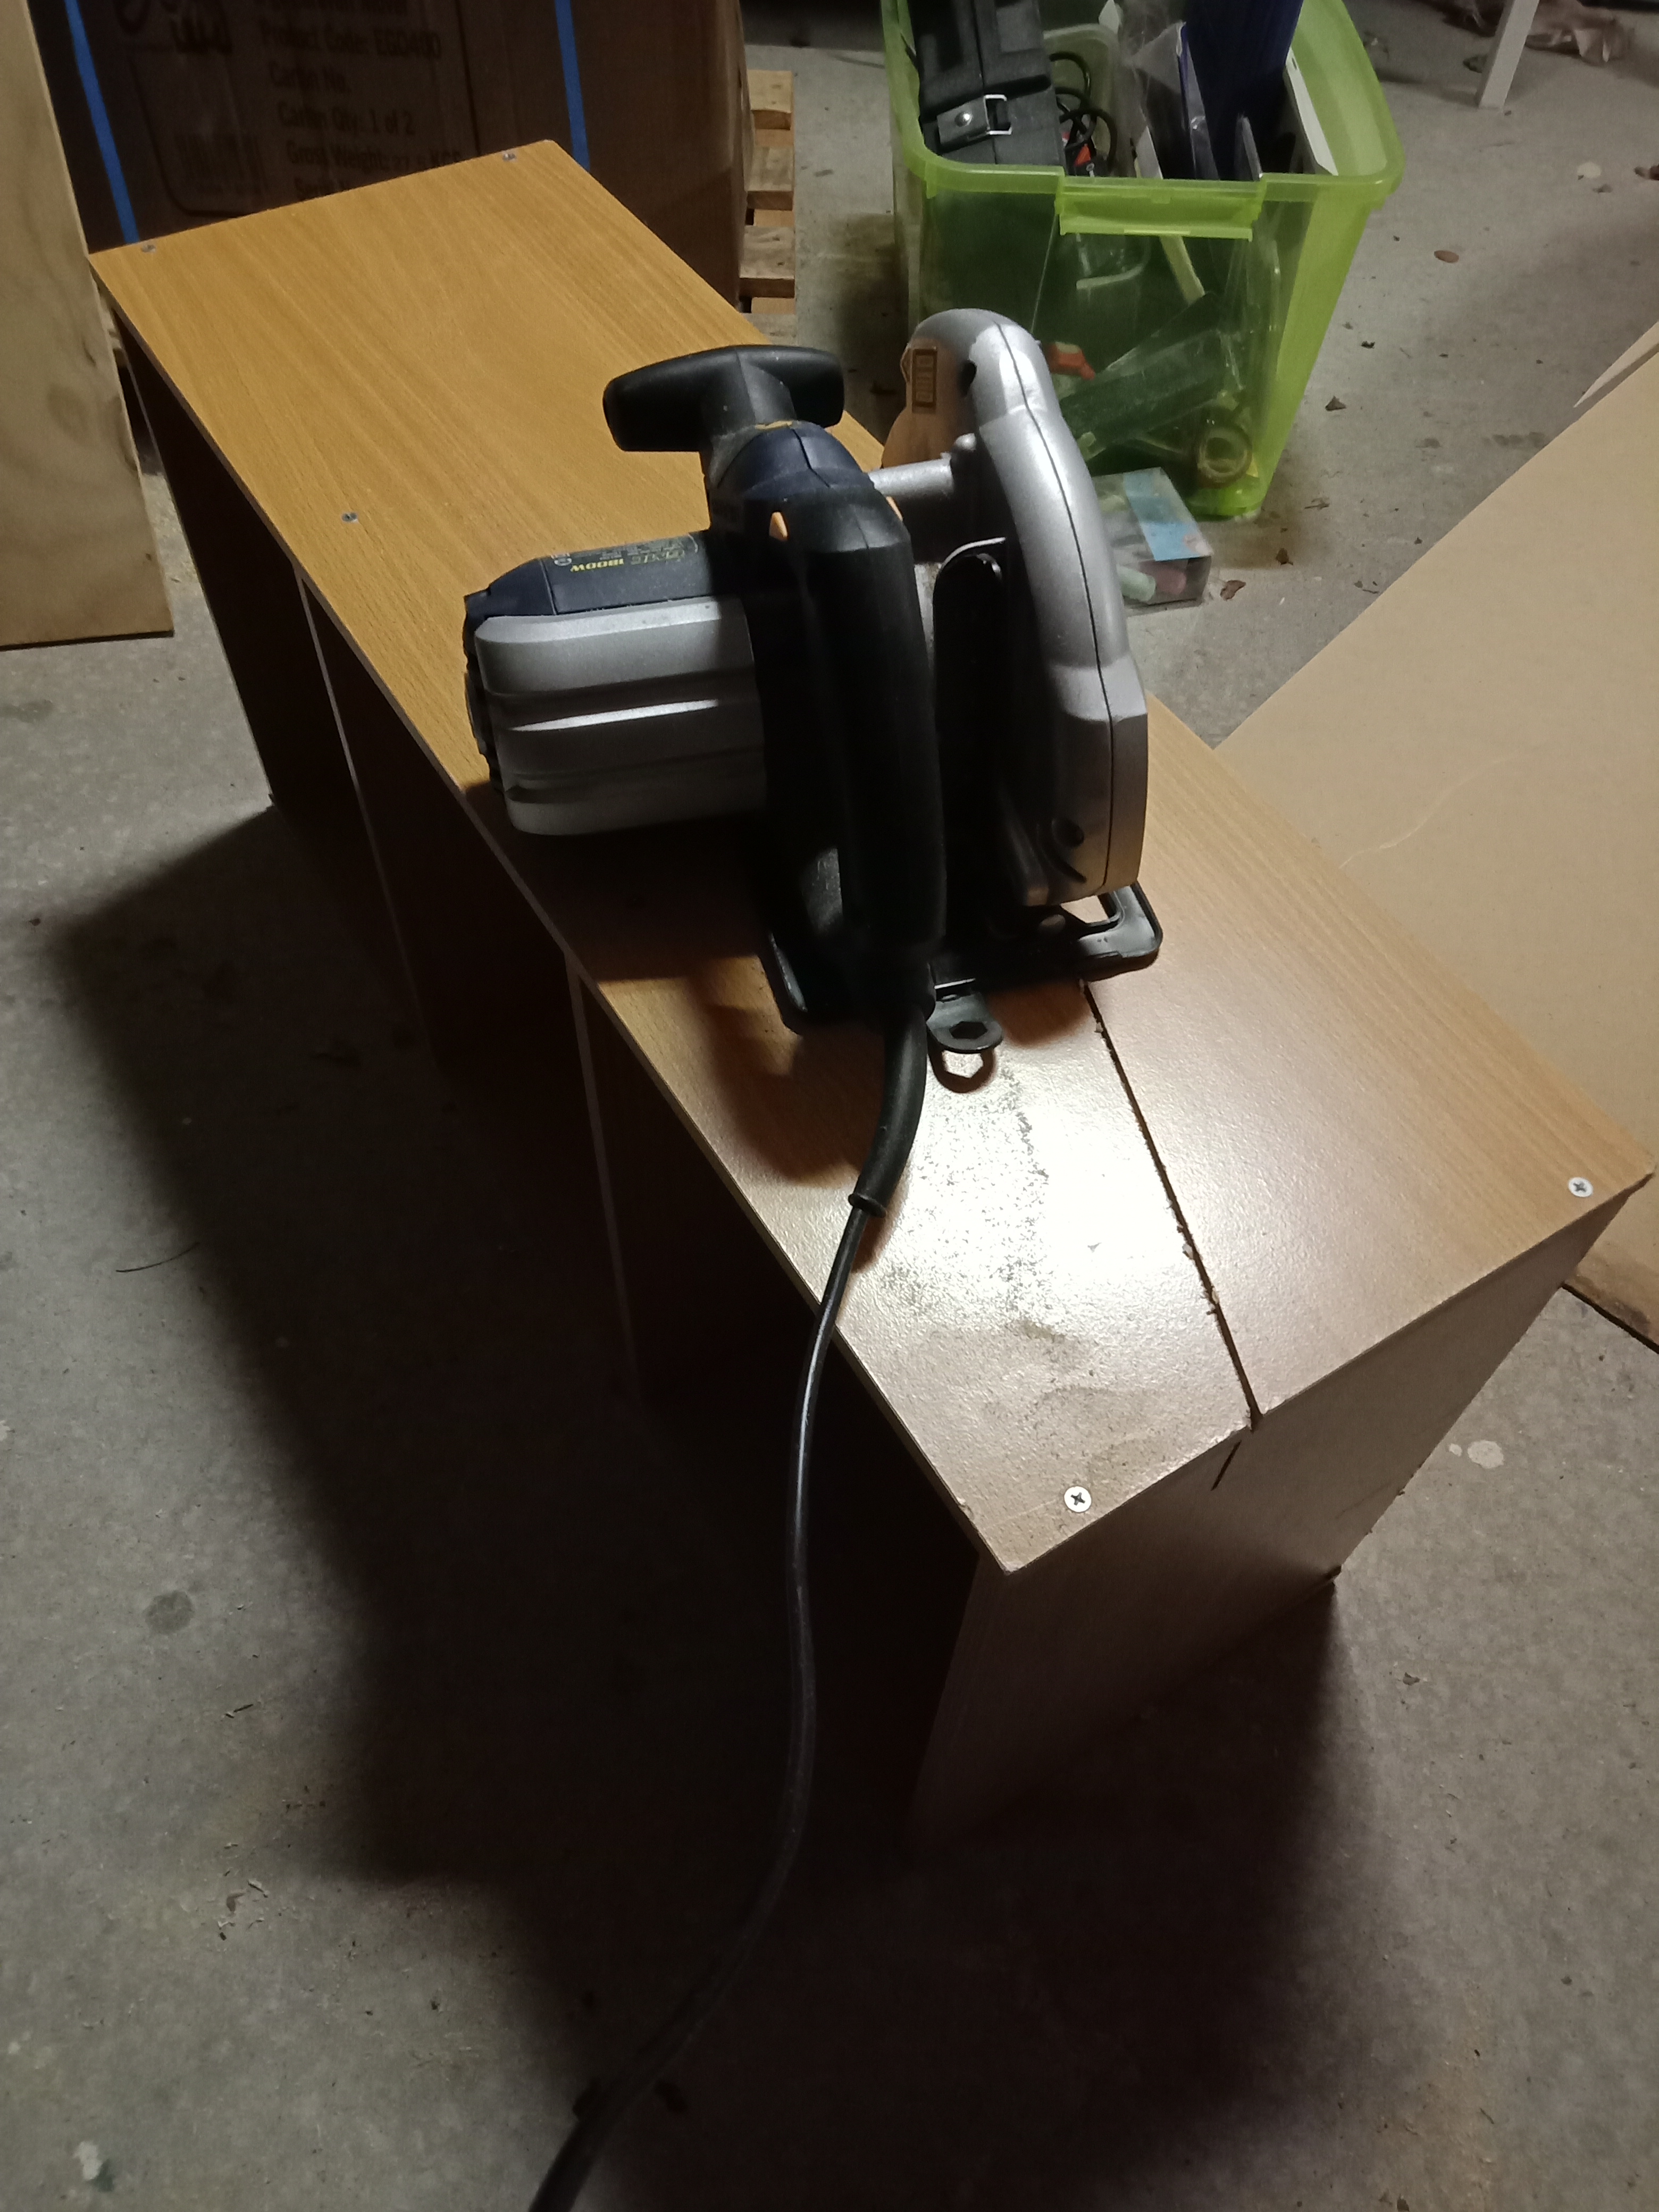
First thing needed is a bed. My first attempt was to fix up a broken toddler bed from the tip, but i wasn’t confident in the end product, so back to the tip it went. I also wasn’t confident in my ability to cut timber straight and square. This is where Mr Bunnings comes into his own. After measuring and planning I bought my timber for the bed frame and legs, and for about $3 extra Mr Bunnings cut them for me.
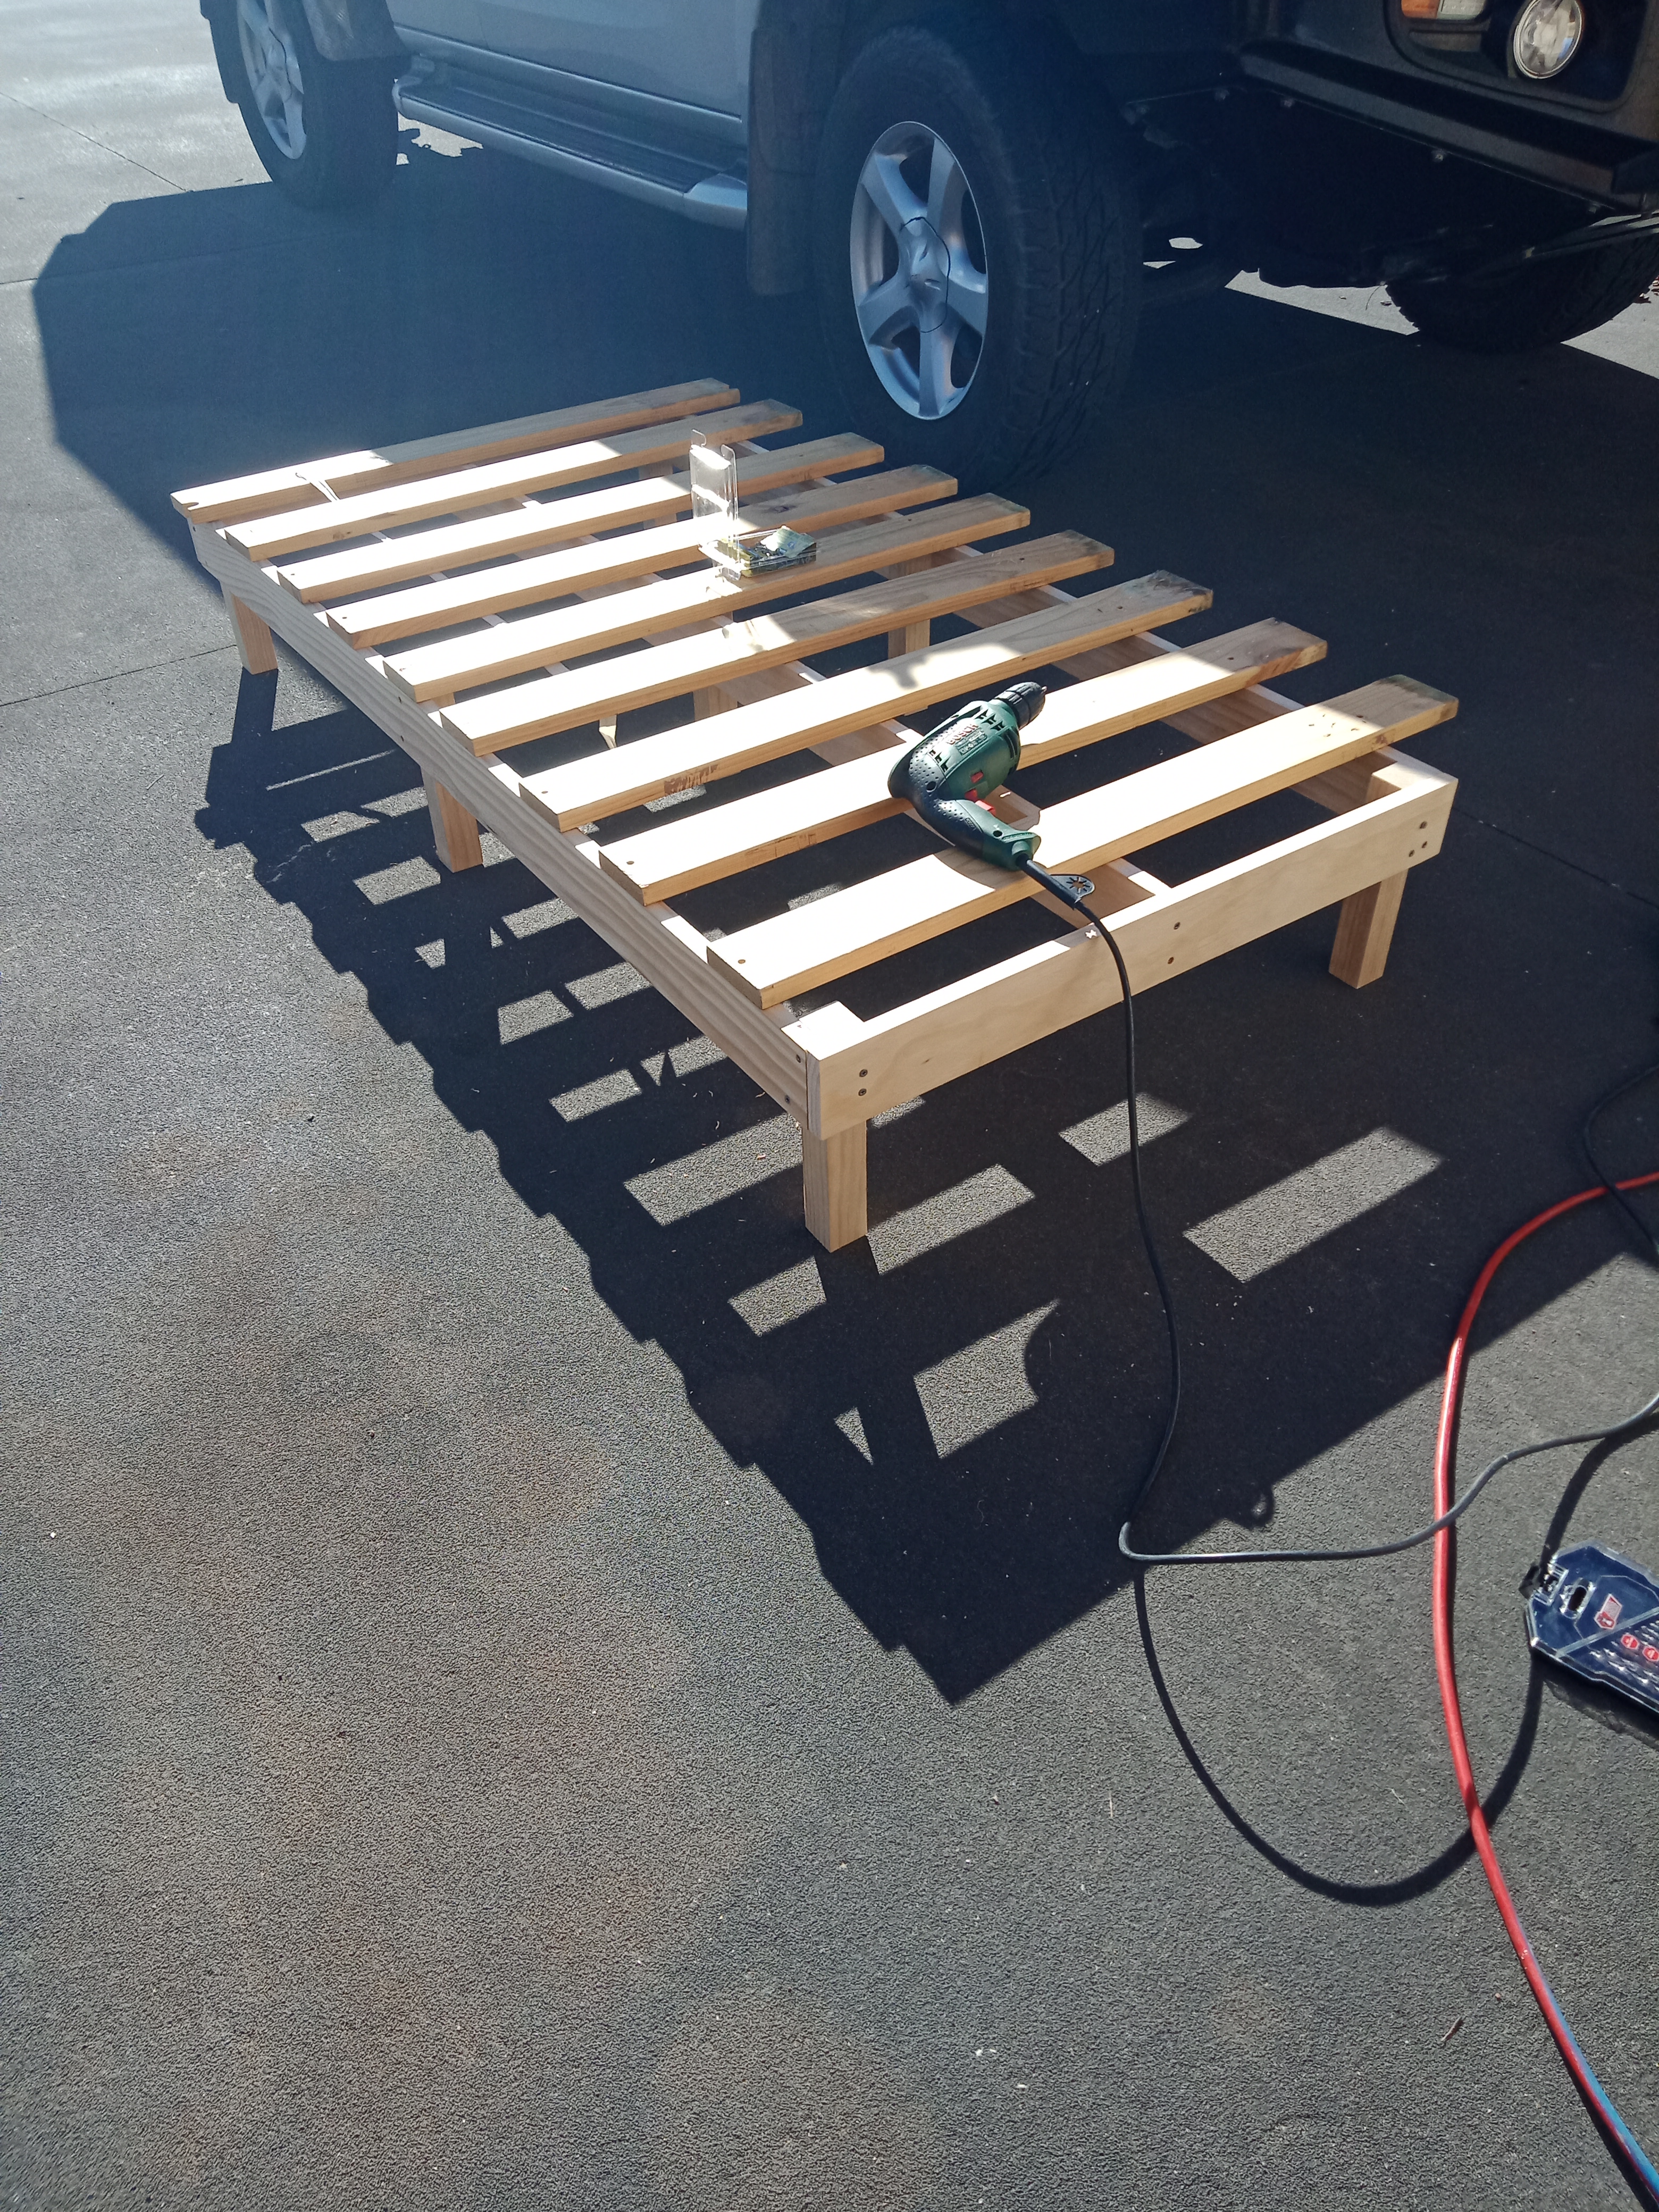
A friend commented that I’d done a good job, countersunk the screws and all. No. Just soft pine and poor drill control really. Hope it holds together.
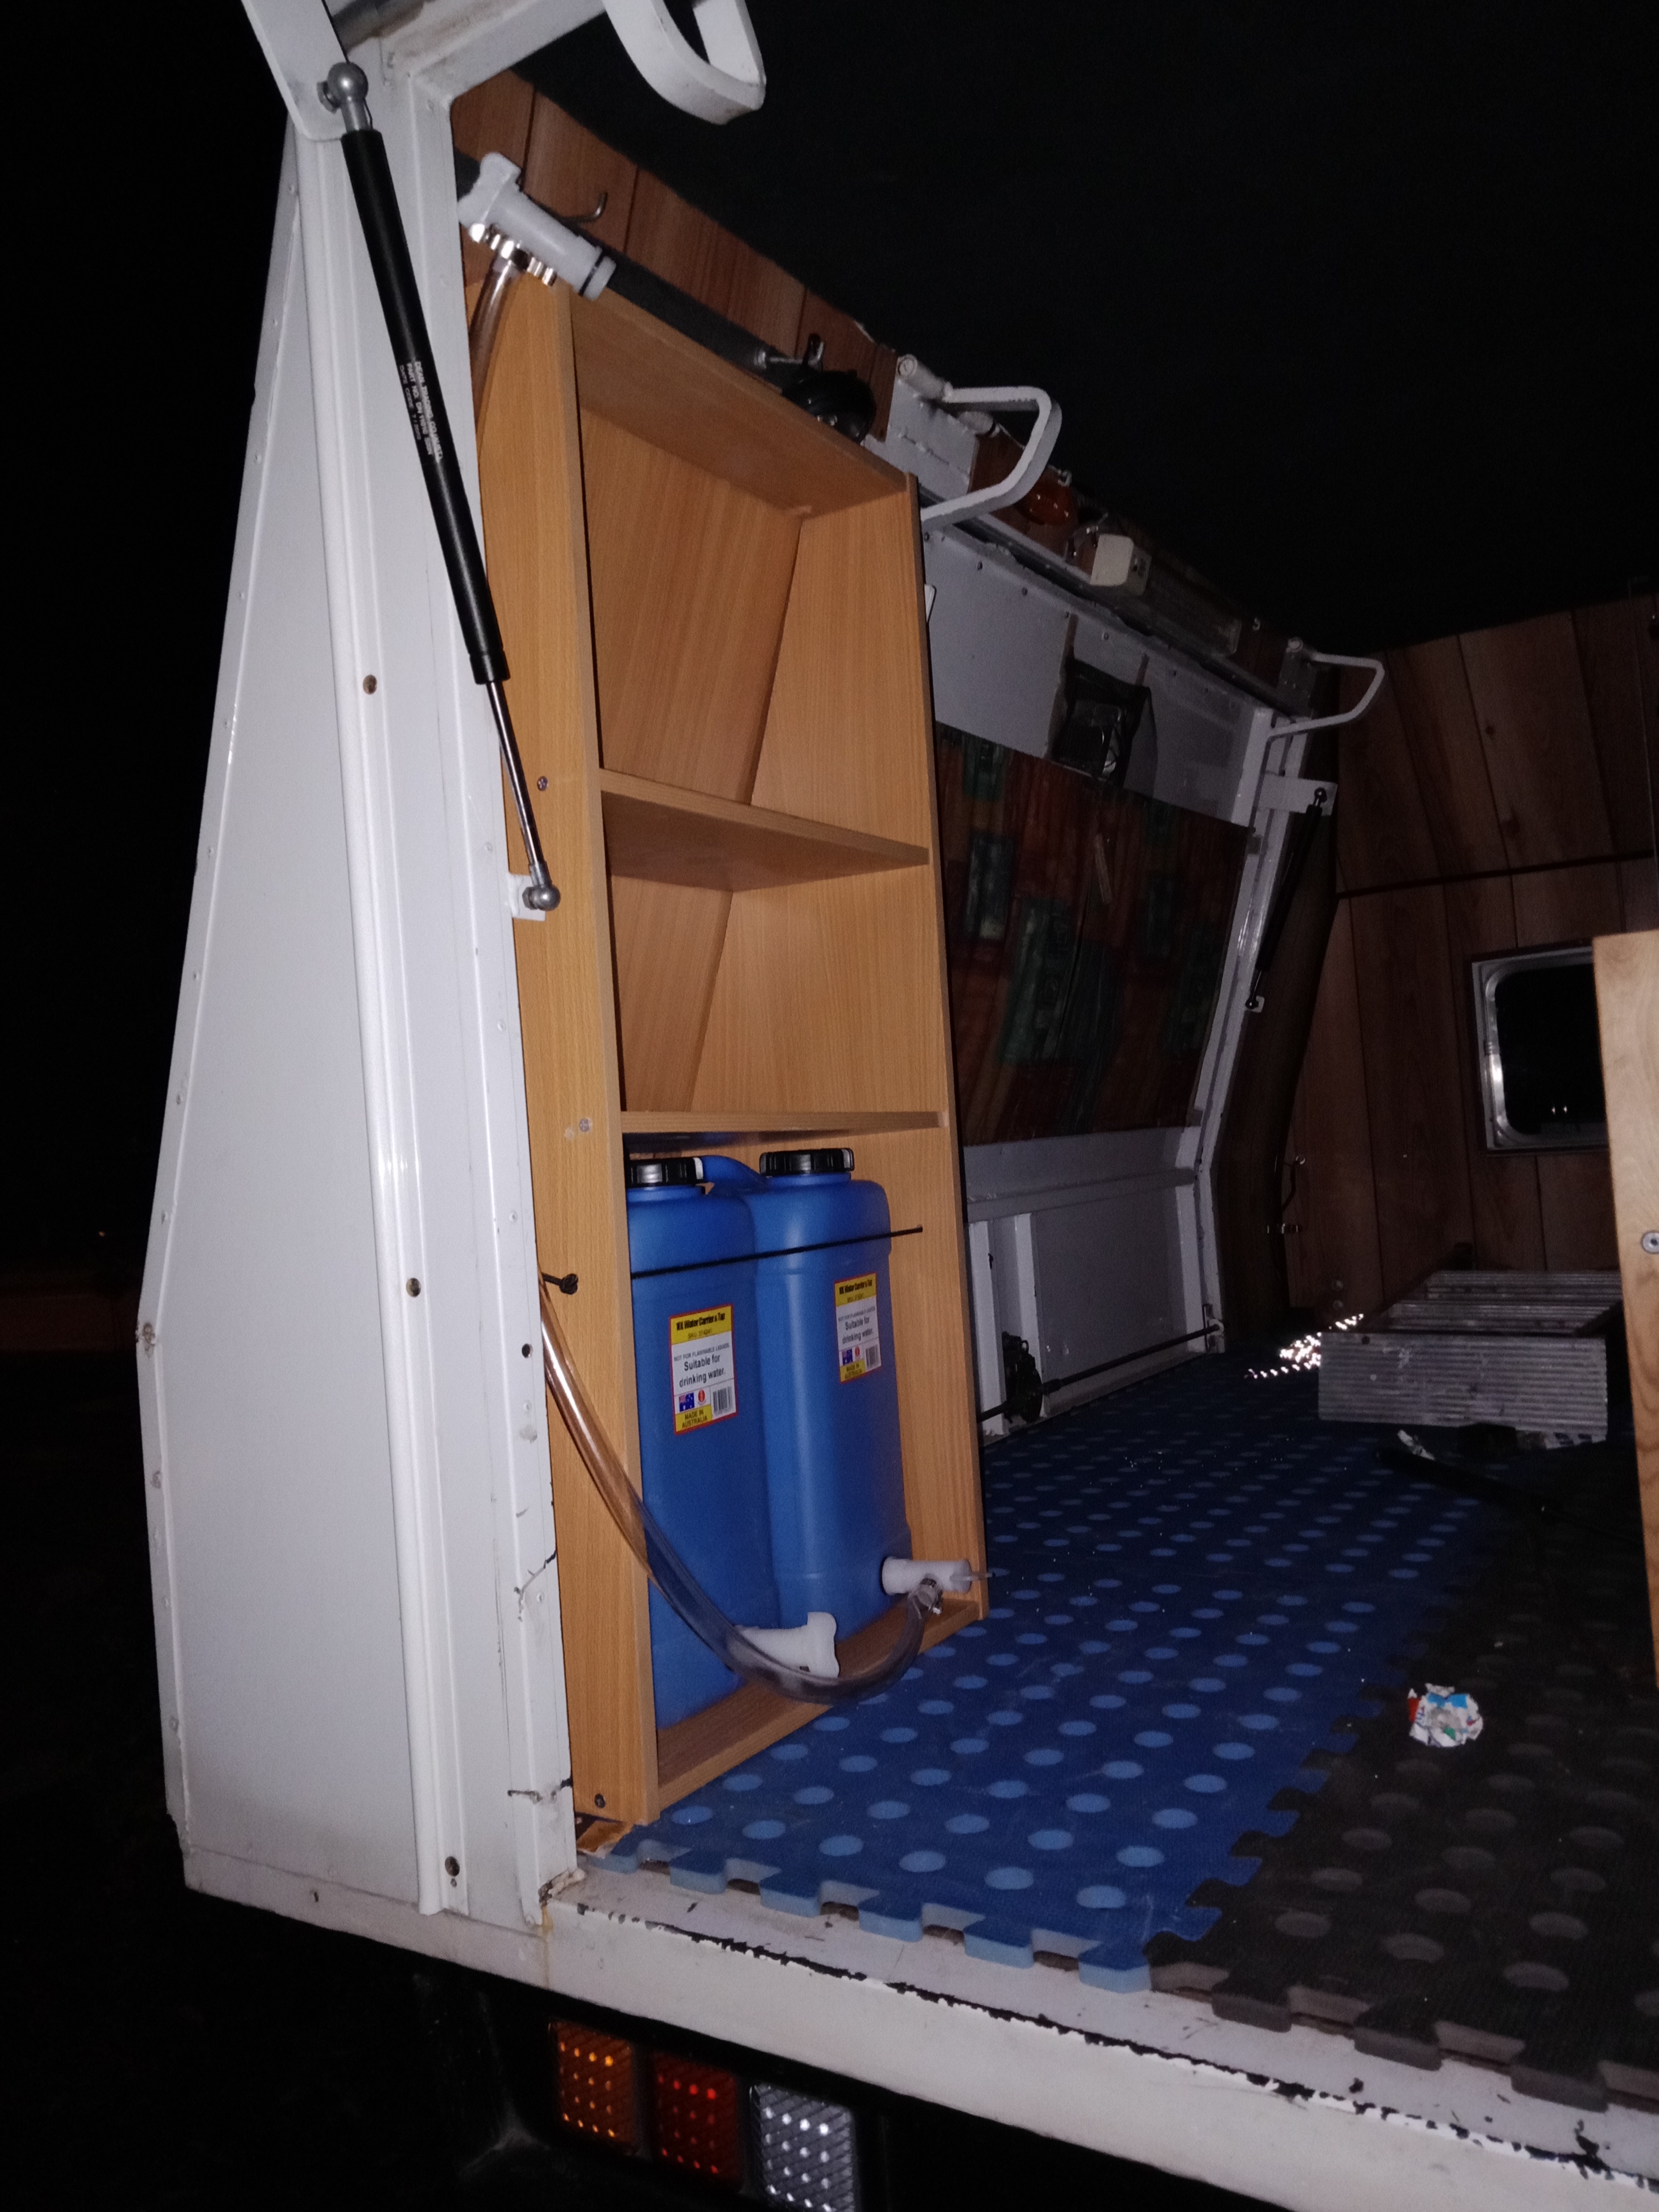
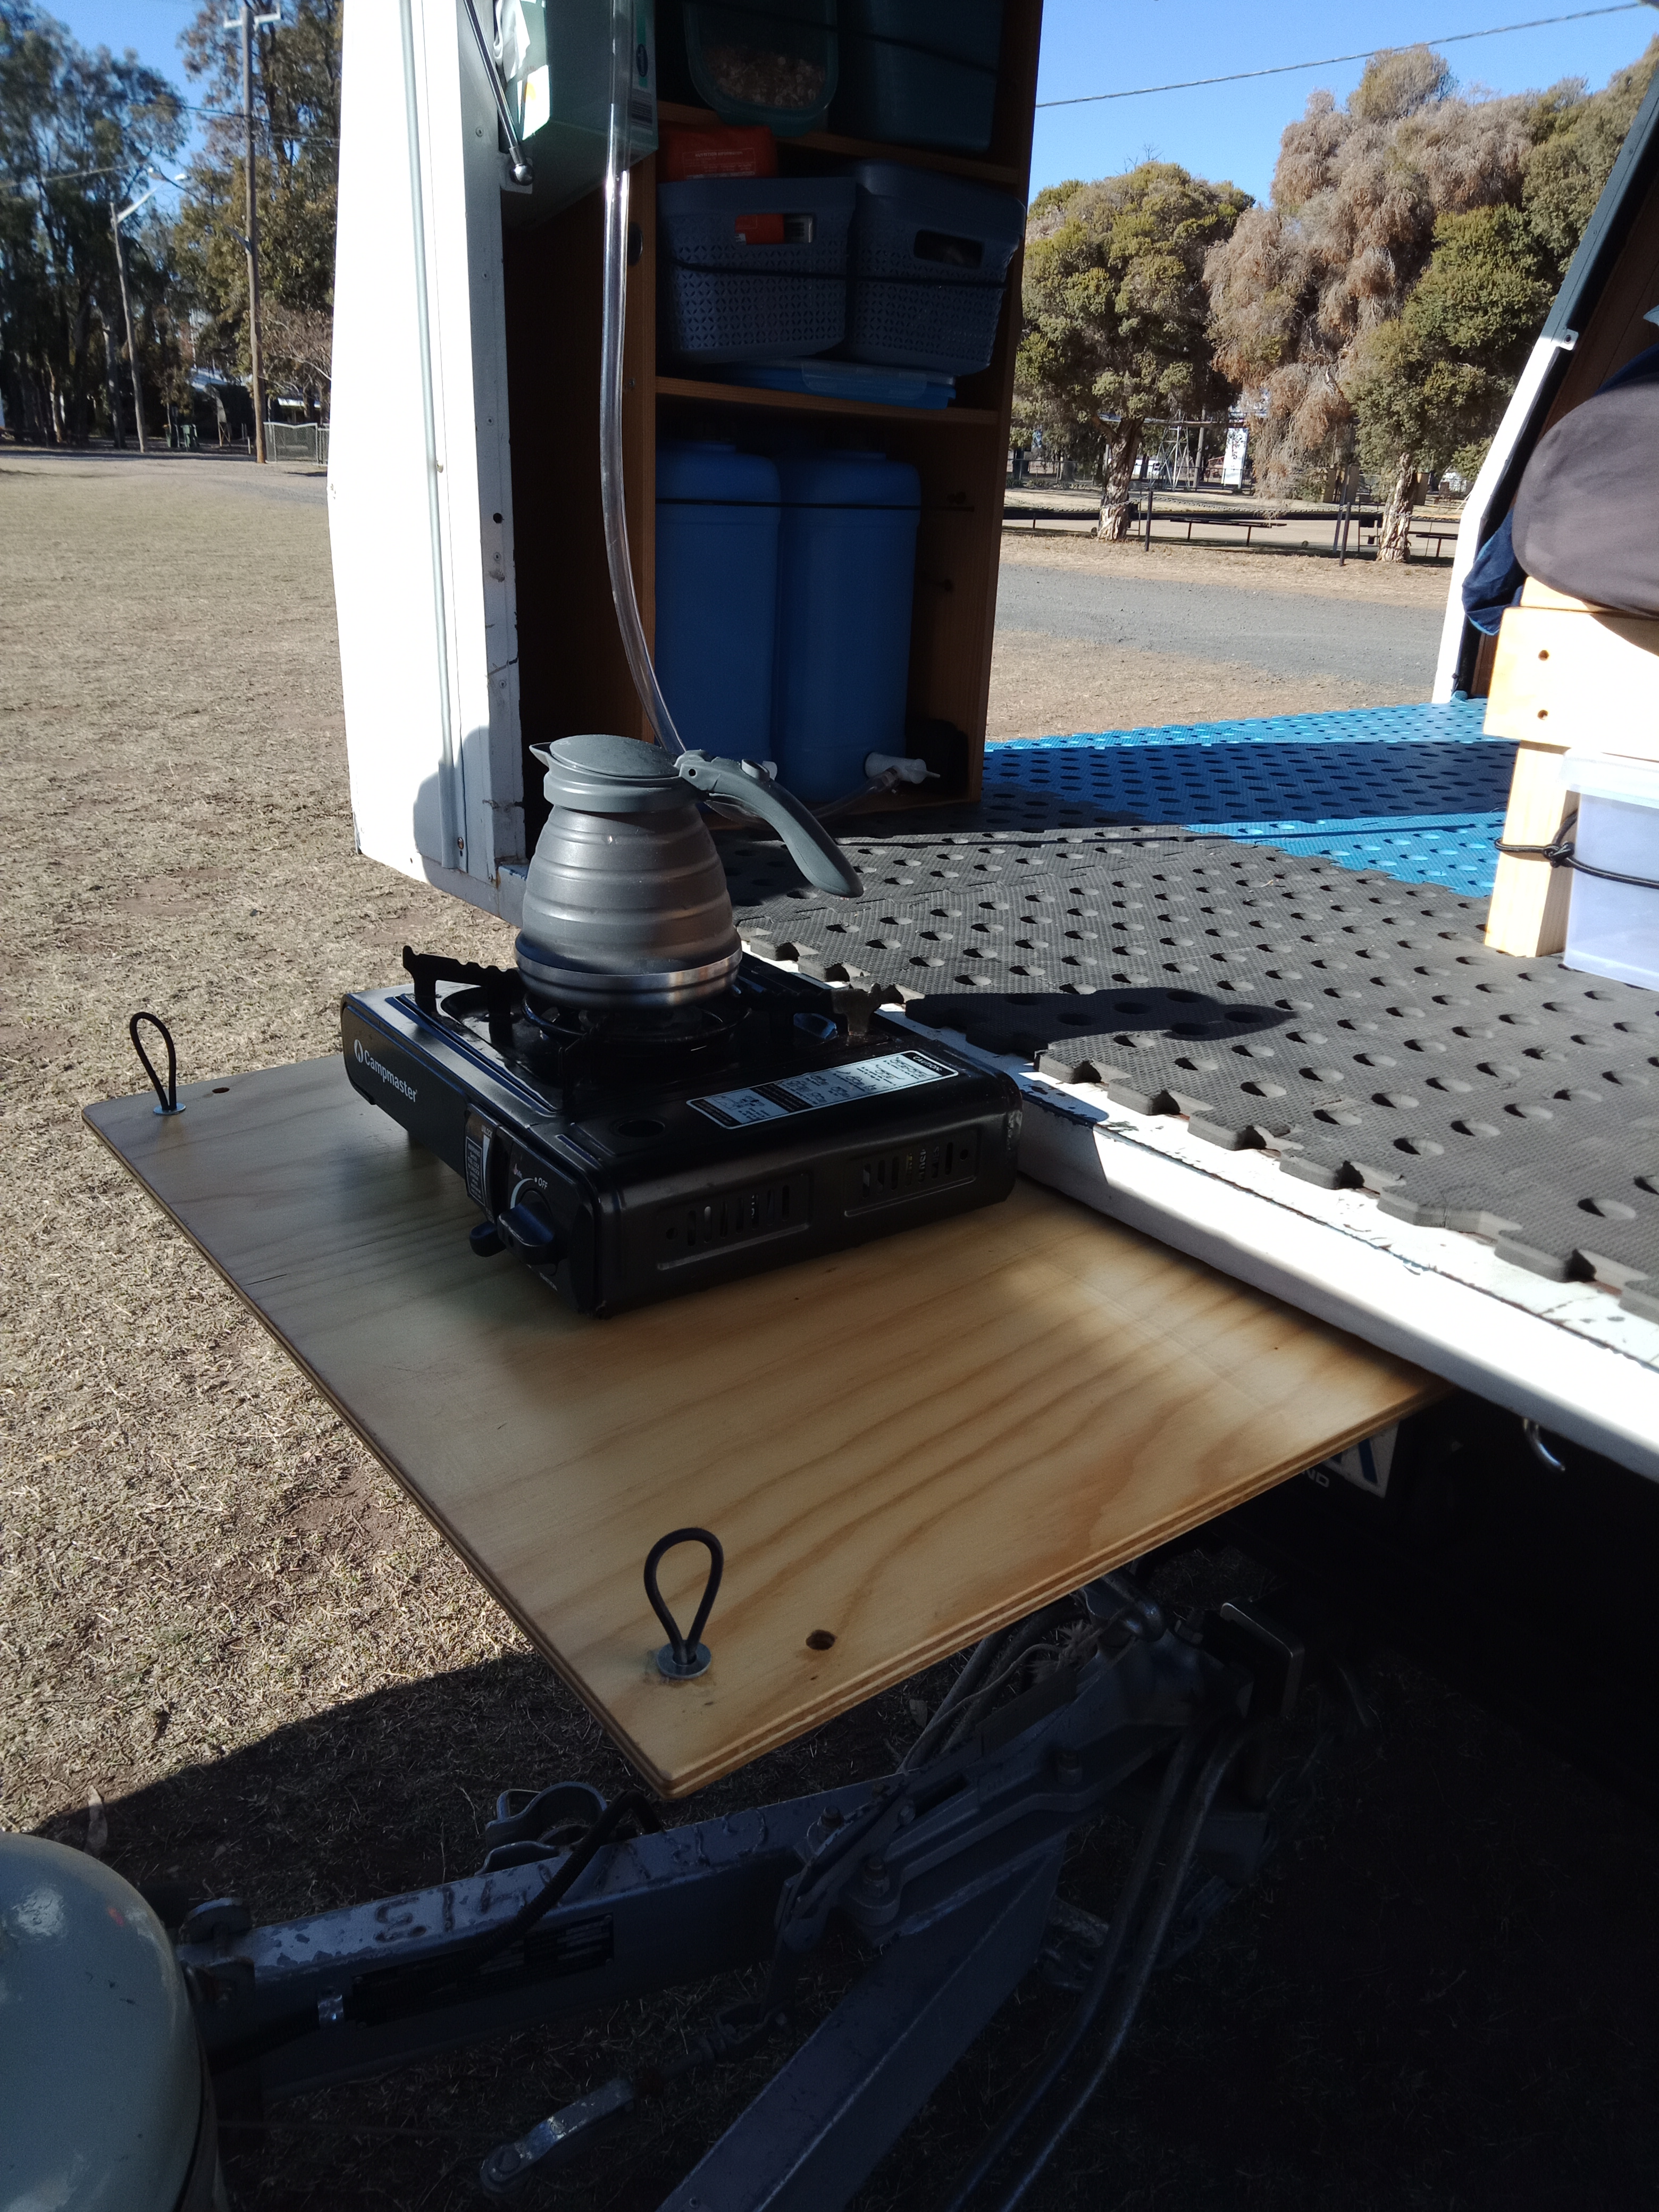
Next, some cupboards for my kitchen area. This involved another trip to the tip – we were almost on first name basis by now. Two sets of shelves for $10. Bargain! Got the permanent marker out, traced wall shape onto the side of the cupboard and took the circular saw to the back and sides of the cupboard then reattached the back. Bit rough but it fits brilliantly. This gives me somewhere for water storage (two smaller containers are easier to lift than one larger one. Note the hose so I don’t have to lift the container out until it’s empty). Plus some gadget and kitchen storage.
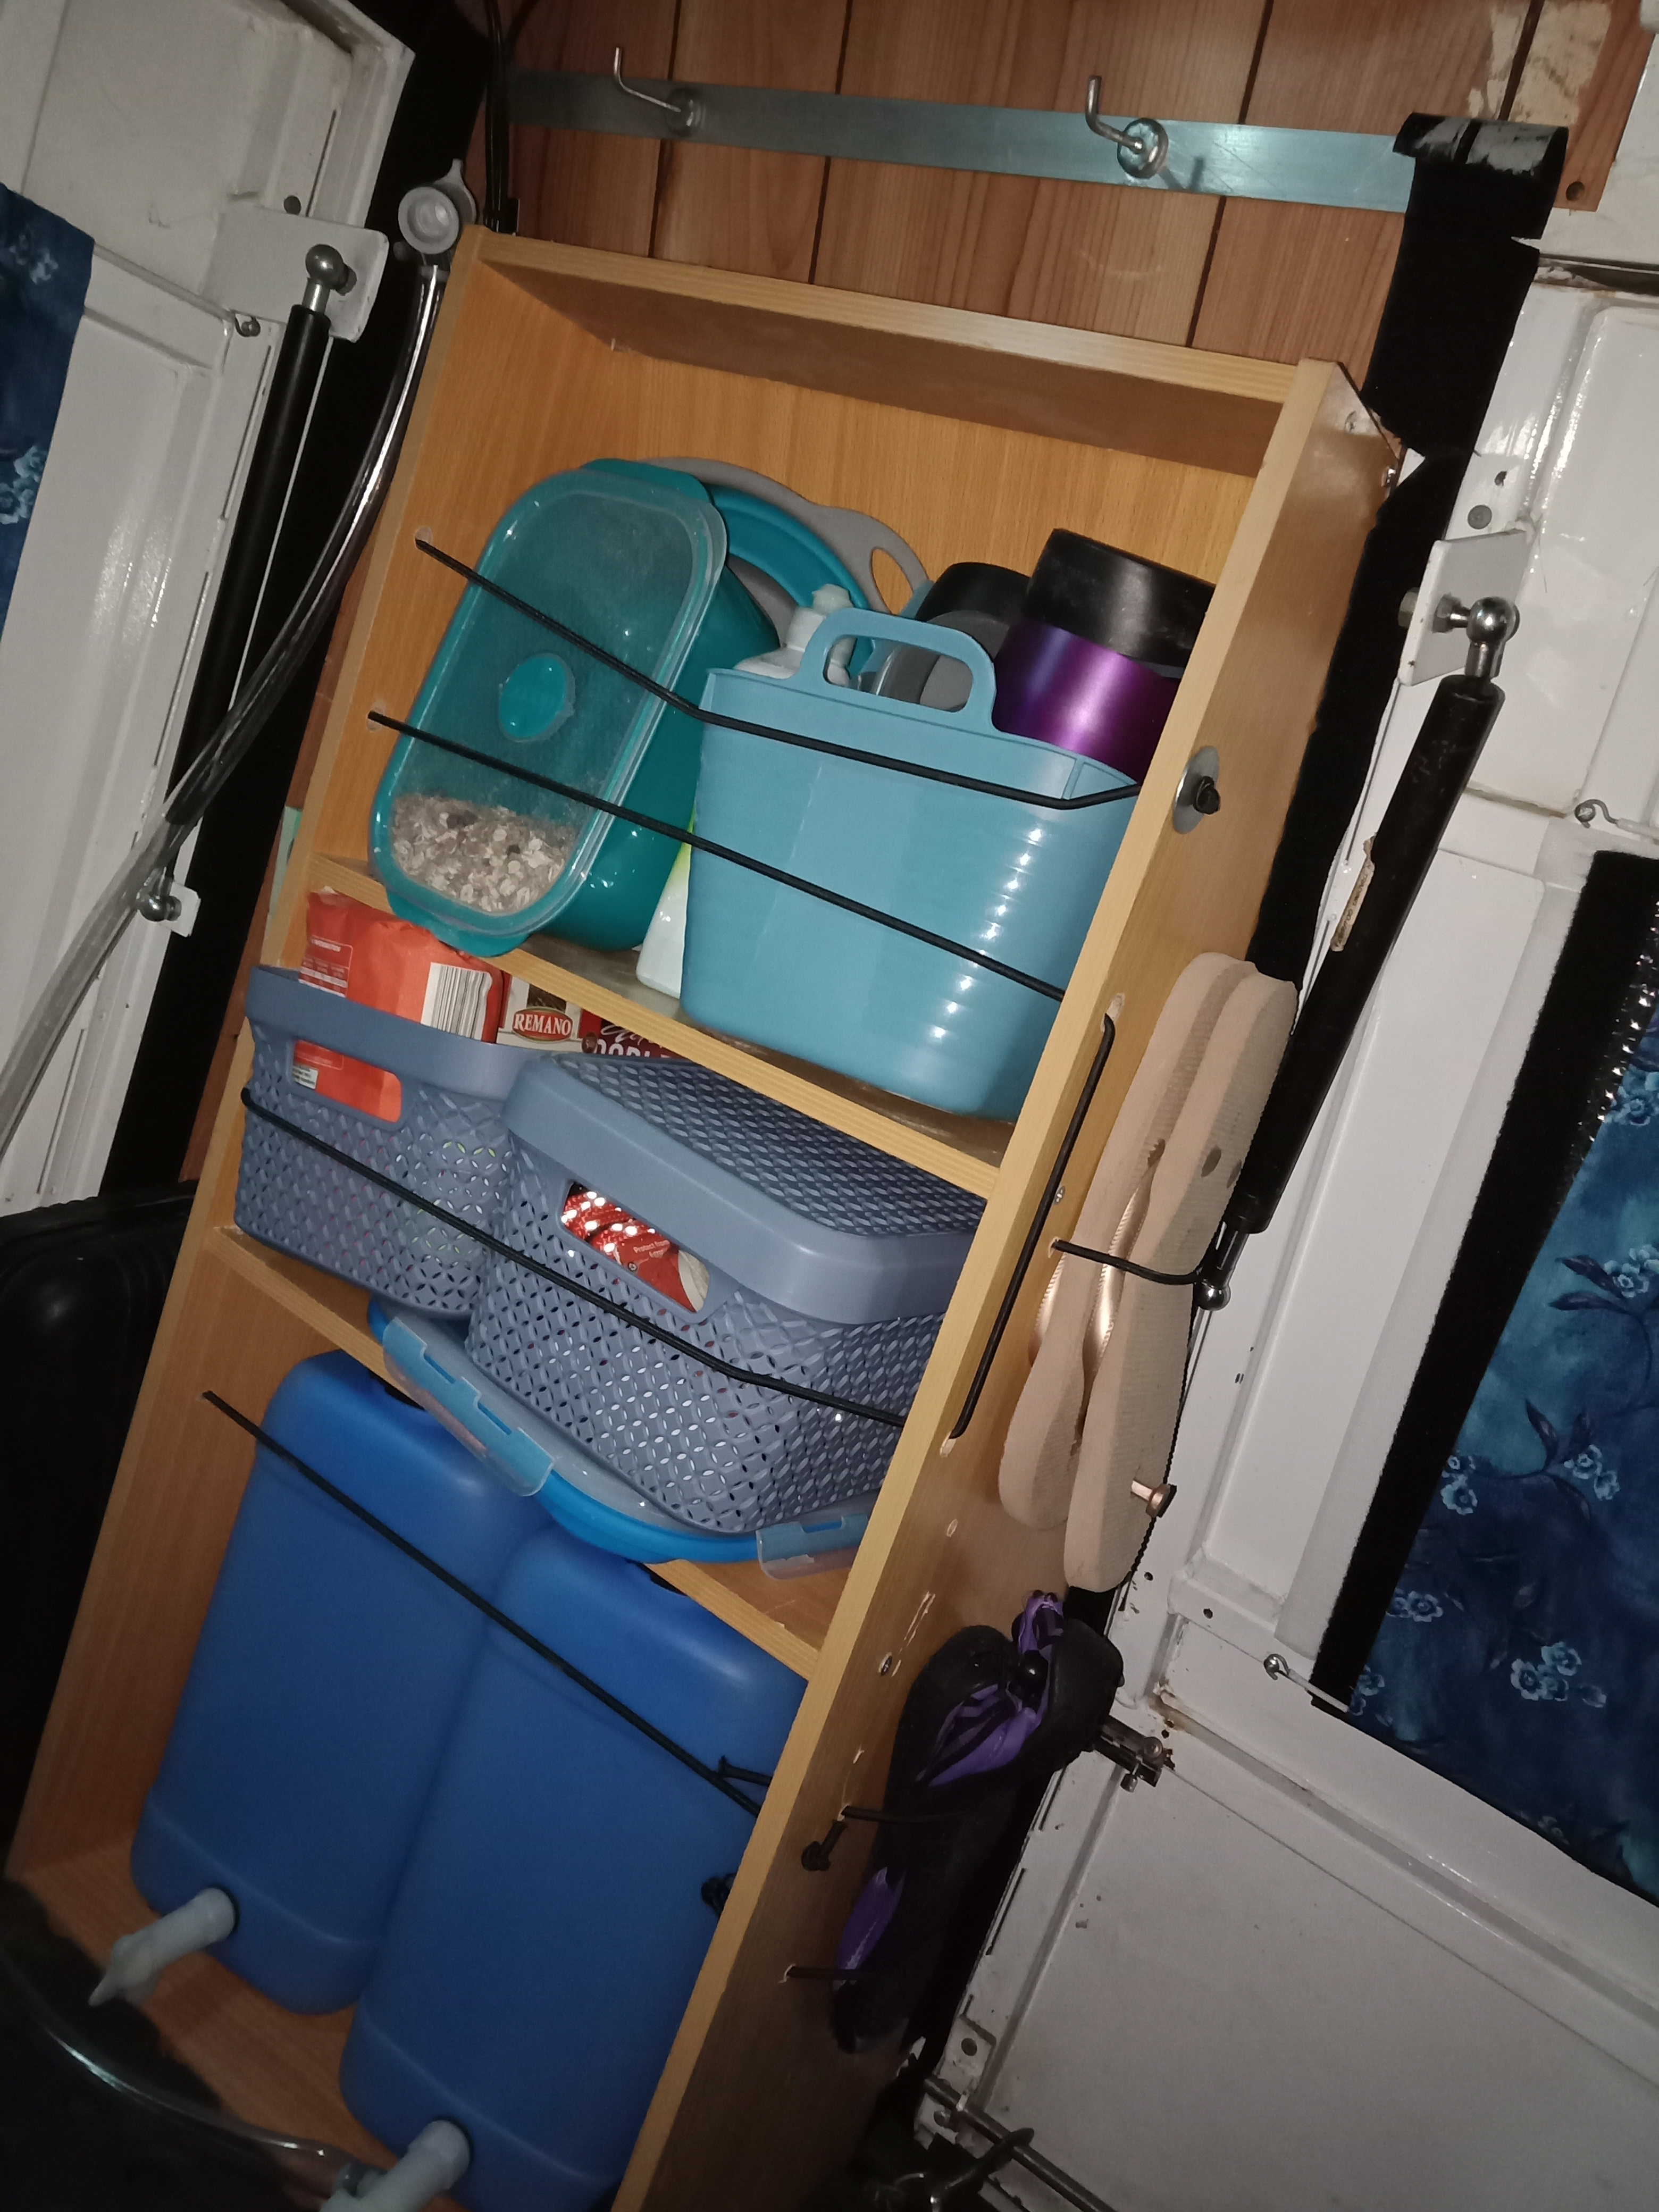
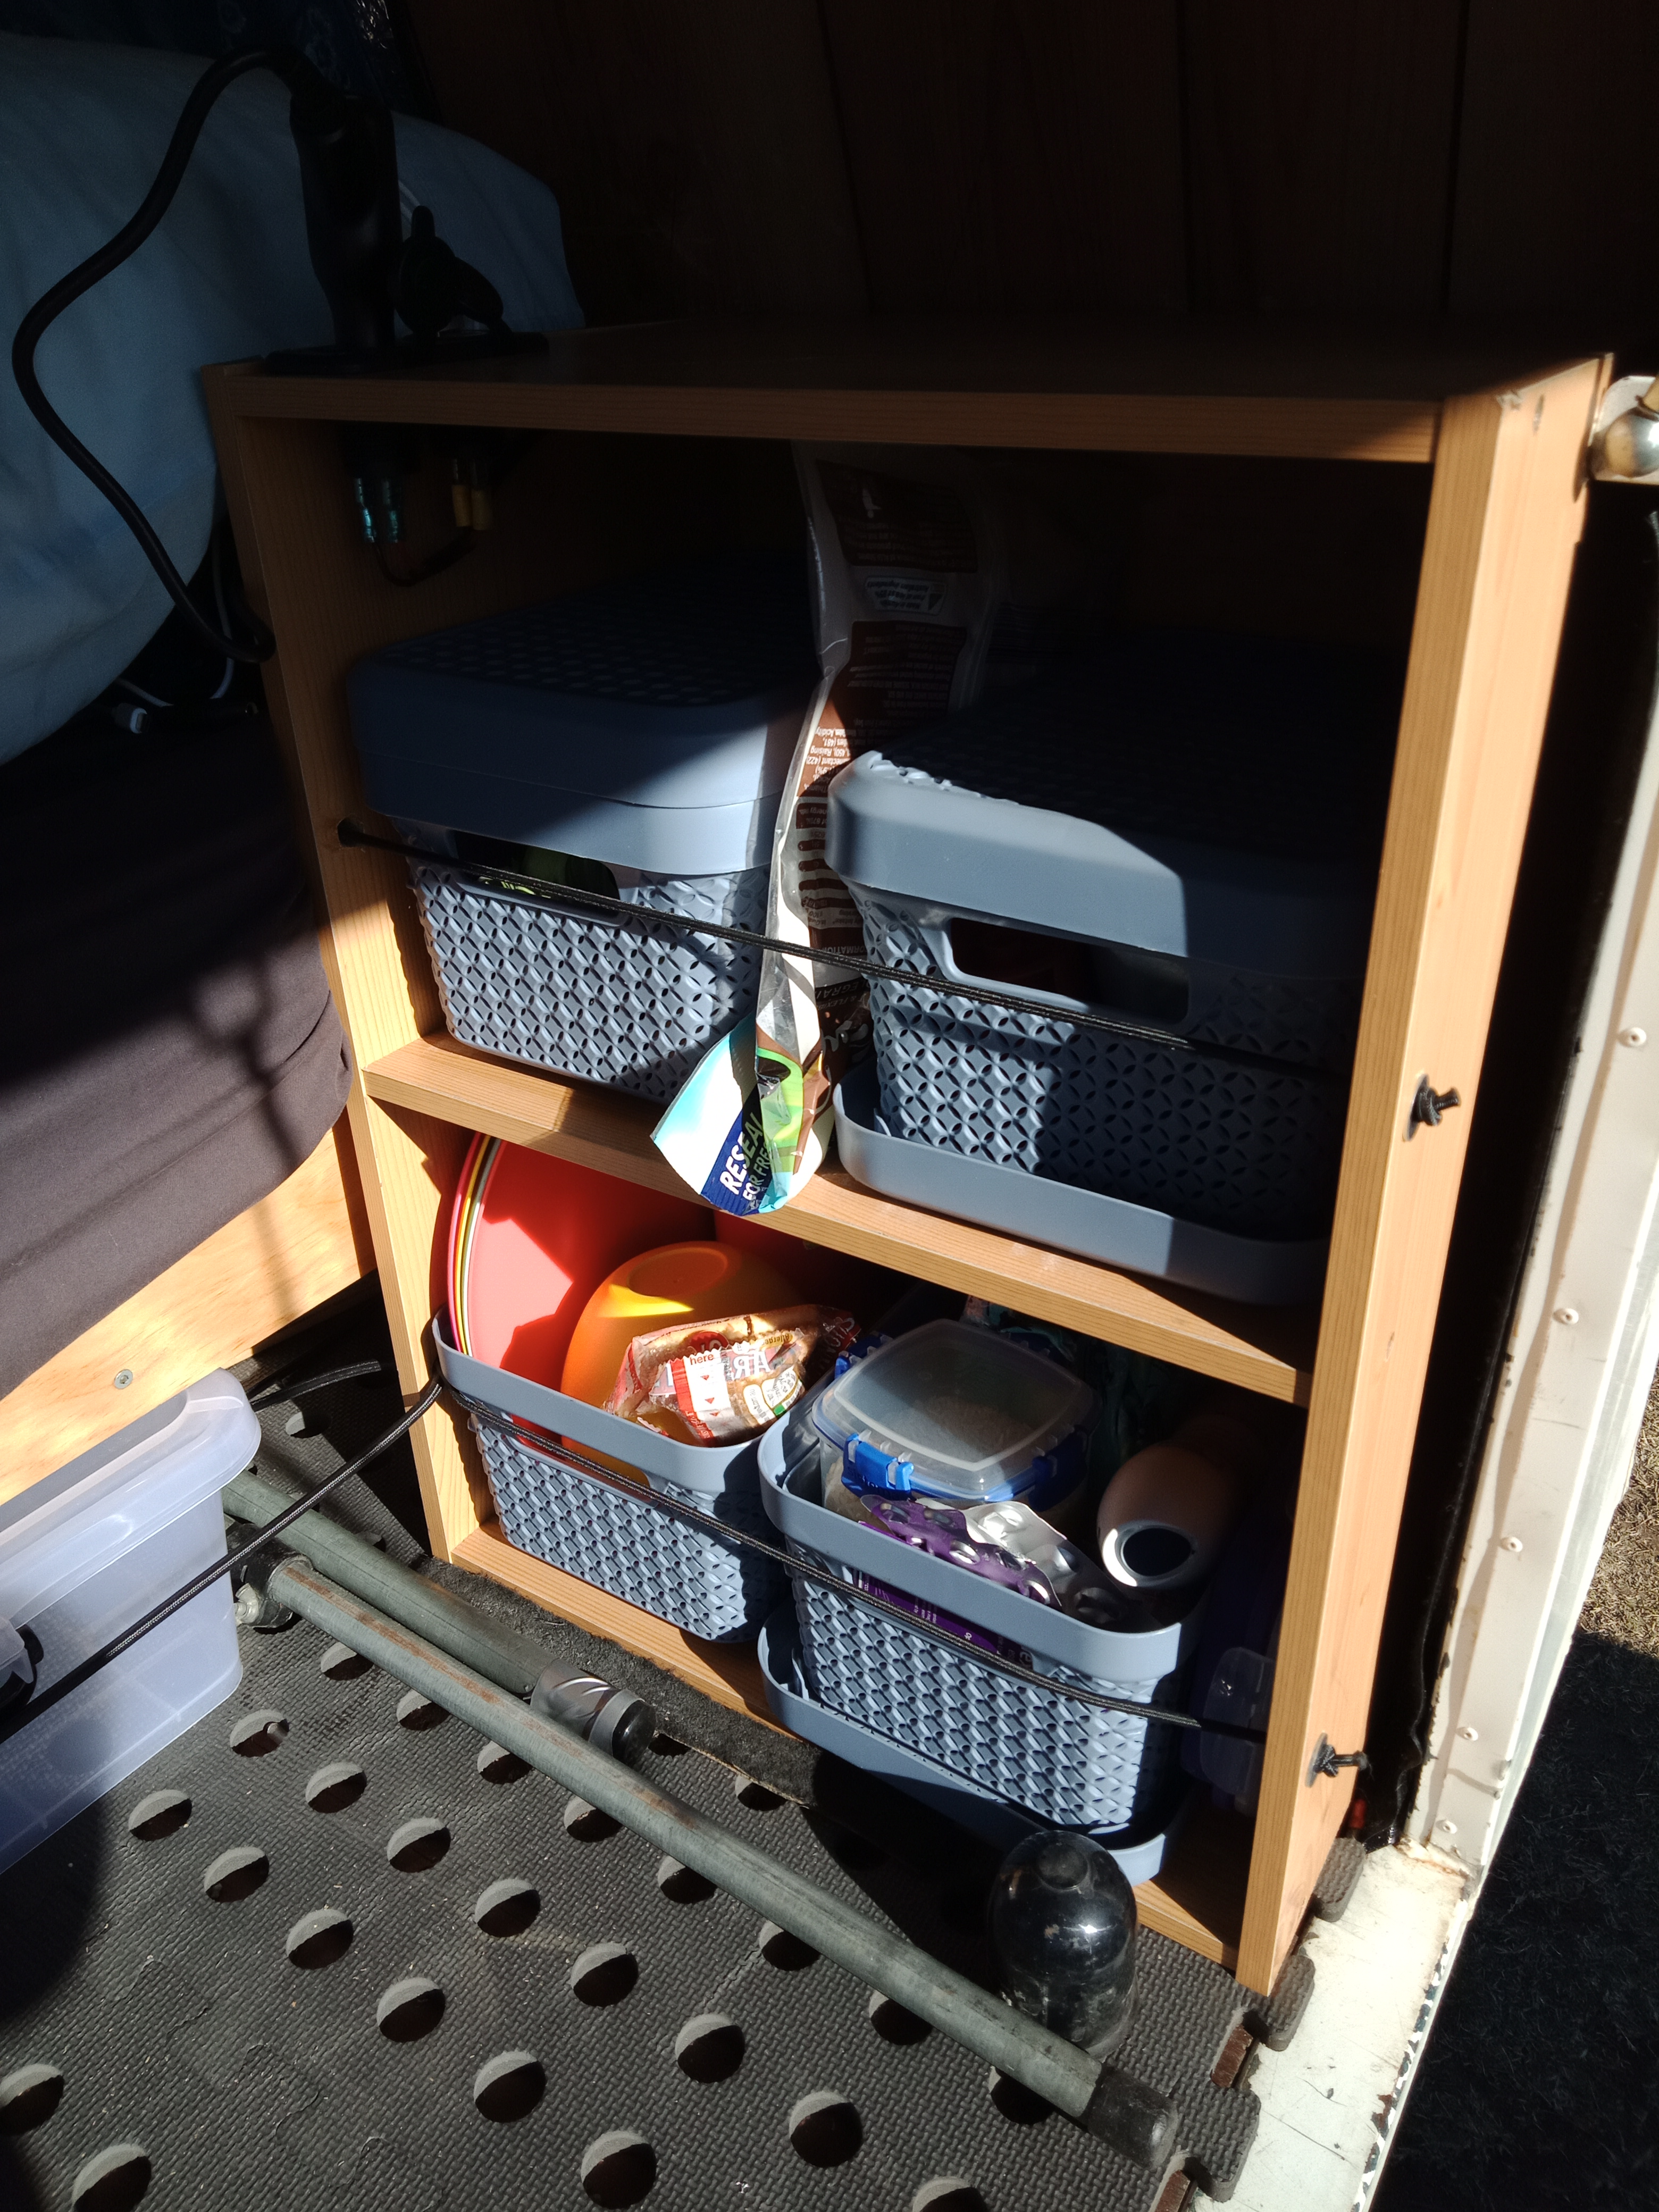
The cupboard at the foot of the bed needed no adjustments, and is my pantry and plates area. On top of this cupboard is a USB charging point , and a plug in point for my CPAP machine.
My next project was my table. I’m really proud of this. There is a tiny space between the canopy and the tray of the Ute, just large enough to slide a piece of timber Into. This is my table. Sanded and varnished, and secured in place for travel. Slide it out a short distance and it is good for supporting my stove. Slide it out further and support it with two adjustable tent poles and it’s a larger table for meal prep etc.
New curtains were a must. I’ve also cut down and edged reflective sun shades to go behind the curtains.
The shelf was unfinished and a bit low, so needed a little work
A couple of frustrating days were spent making fly screens. I used midge mesh and added chunky zips down each side so they can be rolled up when not in use. I’ve used lots of Velcro too, adding a strip of wide adhesive Velcro down the sides of the doors, and non adhesive to the sides of the zips. This means i can travel without them on and put them up when needed. The hardest part for me was the door hinge section, as the hinges extend a long way into the cabin. I’ve used Lycra in this area to stretch over the hinges – I’m not entirely happy with it, we’ll have to see how long that lasts!
Wiring up the lights and battery were the last thing, My fishing rods are in and my pool noodles are attached to the roof with velcro, I’m ready to Roll!

Woohoo! Glad all that hard work paid off!
LikeLike